Not safe for Werewolves!
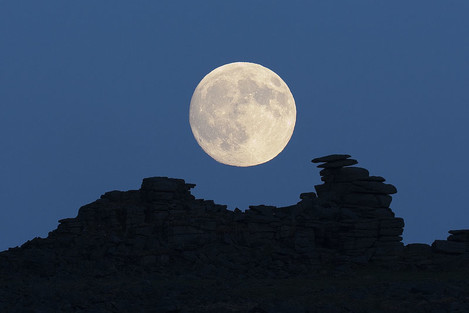
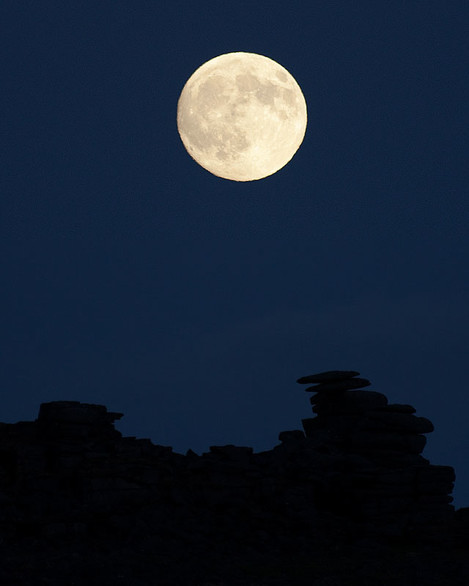
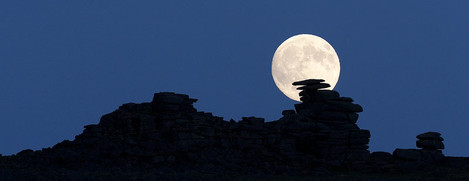
If you'd like to take a telephoto landscape image of the full moon then hopefully this technical guide will help you to achieve that. An image of Staple Tor on Dartmoor shot at 560mm is being used as an example.
Software
The Photographer’s Ephemeris is the tool you will need to download in order to follow this article. No doubt many of you will be using it already, but if you aren’t this program is used to give use times and bearings for the sun and moon at any time of day.
You could also use Google Earth to find interesting skylines. It’s another invaluable photography tool.
Subjects
At telephoto focal lengths it is likely that you are going to be looking for strong silhouettes. Make sure that you can stand 'a long way' from your subject so that the moon and subject are within the depth of field of the camera (unless you want to try focus bracketing which would complicate an already technically challenging scenario!)
In this case Staple Tor has many interesting silhouettes, but there was one particular view that had the best potential. Taking a snapshot can help you plan your final image.
Equipment
If you want a telephoto image of the moon where it becomes the focus of the image then 400mm (35mm equivalent) is probably a minimum. The image here was shot with 400mm 5.6L and a 1.4x converter to give a total focal length of 560mm.
Using a camera with a high pixel density can help to increase the size of the moon in pixels if you can actually resolve the detail. The example image was taken with a 5DMKII and it didn’t quite reach the achievable resolution of the camera.
A sturdy tripod is essential. A Gitzo G2228 Explorer was used for this image. It’s a little lightweight, but with good technique and favourable winds you can make any sturdy tripod work. You will also need a shutter release, some weights to hang off your tripod and an umbrella, all of which will be used to reduce wind induced vibrations.
Planning
To simplify things a little this article only refers to photographing the moon when it is full. It is also possible to take these images at the crescent moon.
At the time of the full moon, the moonrise occurs at a similar time to sunset and the moonset occurs at a similar time to sunrise. This is significant because it reduces the contrast range of the image, allowing you to expose to retain detail in the moon whilst still maintaining colour in the sky, or even having the landscape lit by the low sun or twilight. In general, the time when this contrast range is best is from sunset until around 20 minutes after.
In the image above the contrast isn’t quite there to produce a silhouette of the tor. Waiting till a little later helped to deepen the sky to a richer blue whilst the fill light on the rocks was also reduced
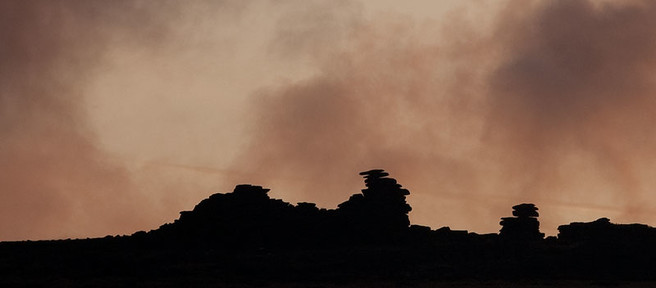
You can see in this image that the contrast is already becoming unworkable just 15 minutes after sunset. On this particular evening there were just 10 minutes in which the contrast range was good for making images and of those 10 minutes only 5 were ideal.
The moon rises in the NE through SE and sets in the NW through SW depending on the time of year. The moon will travel through south along the way, just like the sun. This means that from your planned viewpoint your subject shouldn't be to the North, the moon will never appear there! Equally, if your subject is to the south then the moon will be relatively high in the sky which may pose a problem compositionally.
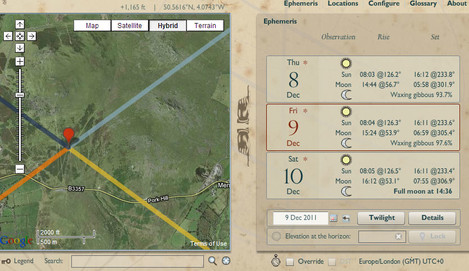
Open up The Photographer's Ephemeris and determine which full moons have the potential of allowing you to capture your shot! Start by finding your location on the map, plant the marker where you think you will be standing to shoot your image then cycle through the full moon dates (it might be better to Google ‘Full moon dates’ to get you there quickly) until you have a full moon rising or setting in roughly the direction of your shot. If this never happens then you might have to go back to the drawing board!
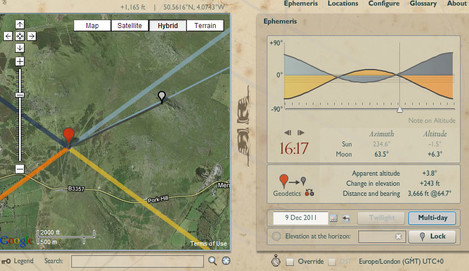
A bit more precision is needed to narrow down exactly when will be suitable. For each of your candidate dates you need to click ‘Details’. Place one end of the marker where you think you will be standing and the other marker where your subject is. You will be given a bearing and an altitude. This is where you probably want the moon to be! You can now move through the day to see how the moon's altitude and position changes relative to your shot direction. Having a little bit of flexibility in your position (in all three dimensions) can be helpful to allow you to match the direction of your subject to the moon. Obviously, you want the altitude of the moon to be above the altitude of your subject!
In the case of the Staple Tor image the moon needed to rise before sunset in order that it could get high enough in the sky to be photographed with the tor, whilst still having twilight to keep some colour in the sky and reveal the silhouette.
You should now have a number of candidate times where the moon is in the right place. Unfortunately many of these times may be unsuitable! You might start with 5 potential days, but by the time you’ve accounted for wind, cloud and life getting in the way you might only have 1 opportunity! In fact the image on show here came after nearly 18 months of waiting and 6 months spent looking forward to that specific Friday.
Recon!
Before 'the big day' try to mock-up a Photoshop image of what you are expecting to shoot. If you use the same camera setup then you can see how big the moon will be relative to your composition and make any adjustments as required. The mock-up might increase your determined to capture the real thing.
Capture technique
Now you've planned exactly where and when you need to be and realised that the opportunities to get your shot are few and far between, the last thing you want to do is mess up the shot!
As far as ISO, aperture and shutter speed go, there is no single correct answer. For the example ISO was compromised first, setting it to ISO800 to allow a short shutter speed to combat motion blur due to the wind. Following similar logic, the aperture was set to f8 (the widest possible with the lens and extended). A practice a few days before showed that a shutter speed of 1/200 should be possible.
You will also need to set mirror lockup on your camera to separate the mirror flip from image capture, reducing vibration. Alternatively, you can set your camera to live view so the mirror remains up. Shoot RAW so that you can adjust exposure and white balance later. Save all your settings in a custom mode if you have one on your camera and hopefully you will only have to tweak things on the day.
The last piece of the puzzle is your tripod. It is quite possible that you will find yourself in a breeze (hopefully it’s not too windy!) and if so, you need to set up your camera and tripod in such a way that they minimise the possibility of the wind causing vibration.
- Remove your camera strap
- Remove your lens hood or collapse it
- Lock the camera firmly to the tripod
- Set your tripod up without extending the last leg sections and without using the centre column.
- Force the tripod legs into the ground if possible
- Hang weights from the tripod. 10kg of dumbbells were used for this example to increase the inertia of my setup and hence reduce the winds affect on it. Make sure that whatever weight you use is in contact with the ground to prevent a pendulum effect.
- Use an umbrella as a windbreak.
If there is no wind and you are setting up on a hard surface then you probably won't need any of these techniques.
The Big Day
With everything planned it is probably unnecessary to explain in any more detail exactly what to do. It is important however that you don’t let your planning get in the way of any creative opportunities you might have.
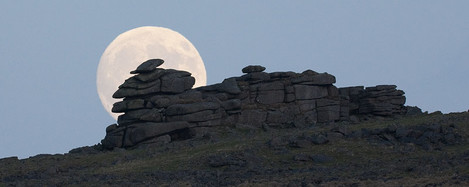
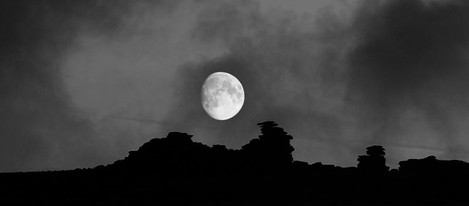
The final shot of Staple Tor, was different to the shot that was planned. The below image was captured first but later recomposed to move the moon behind the tor.
Whatever you do, when you get the chance to take your image, make sure you make the most of it.
Good Luck!
You can see more of Alex’s photography at http://www.alexnail.com/ or at his flickr stream.

