Photoshop Techniques

Tim Parkin
Tim Parkin is a British landscape photographer, writer, and editor best known as the co-founder of On Landscape magazine, where he explores the art and practice of photographing the natural world. His work is thoughtful and carefully crafted, often focusing on subtle details and quiet moments in the landscape rather than dramatic vistas. Alongside his photography and writing, he co-founded the Natural Landscape Photography Awards, serves as a judge for other international competitions. Through all these projects, Parkin has become a respected and influential voice in contemporary landscape photography.
A while back I wrote a small tutorial on how to invert colour negatives using photoshop. At the time I promised a video but was still working on the technique. Since then the process has been refined a little and I’m finally happy to show to give a comprehensive guide. Now most of the scans I make are on a drum scanner but I’ve tested the process on an Epson V750 and although it doesn’t work quite as well, it still gets you where you want, it just takes a little longer.
Now the logic behind the technique is the same and you can look at the previous article for my thoughts. In short, instead of setting the white and black point to neutral, it sets the points 10% away from both black and white as neutral because it’s the middle linear part of a film that has neutral colour, whereas the deep shadow and bright highlights tend to have colour casts.
Since the last article I’ve started using default auto settings and then adjusting manually afterwards. So the first thing to do is to open up the ‘auto options’ and set the clipping to be 9.99 and the black and white level to 30% grey and 70% grey respectively. This gives you a good starting point for most images. You can tweak this as necessary if your scanner produced consistently lighter or darker images, it might help as a starting point however for this article the examples are raw scans straight out of the V750. Let's take this through step by step.
Scanner Settings
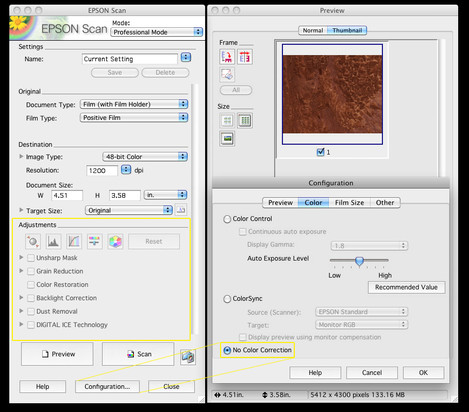
Your scanner should have all of its adjustments turned off and the colour management disabled. Check the following settings information for the Epson V750. Notice the greyed out adjustments panel and the 'no color correction' selection in the 'Configuration...' panel.
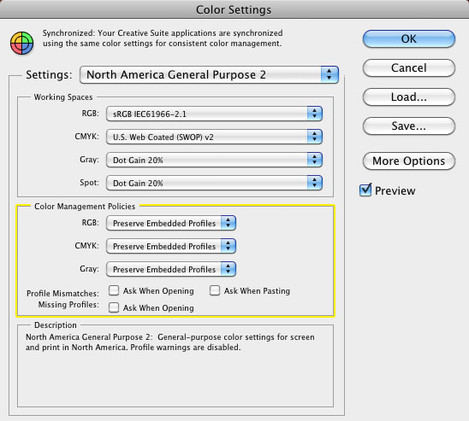
This should produce an uninverted raw scan. When you open the image in Photoshop it should appear without any colour profile (if you go to 'assign profile' it should say have "don't colour manage this document" set. Your Photoshop 'Color Settings' (in the Edit menu) should not be converting to a working space. They should either show 'preserve embedded profiles' or 'off'. See the image below. If in doubt whether your scanning software is applying profiles or not you can tick "Missing Profiles: Ask When Opening" and then when you open your scan it should alert you that it has no profile applied.
Inverting and applying basic settings
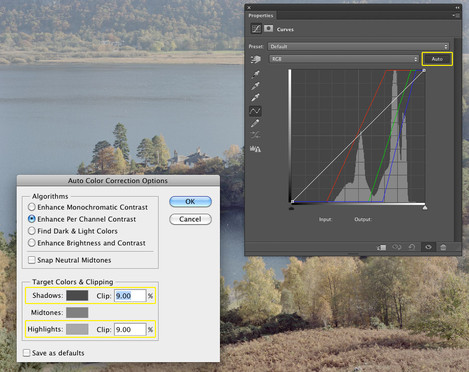
First either invert the scan or add an invert adjustment layer. Then add a curve adjustment layer and 'Alt Click' on the 'Auto' button (highlighted in the diagram below). This will bring up your 'Auto Color Correction Options'.
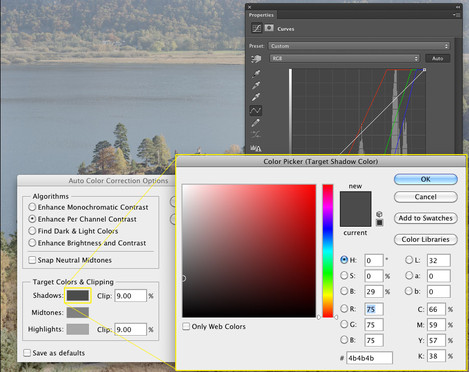
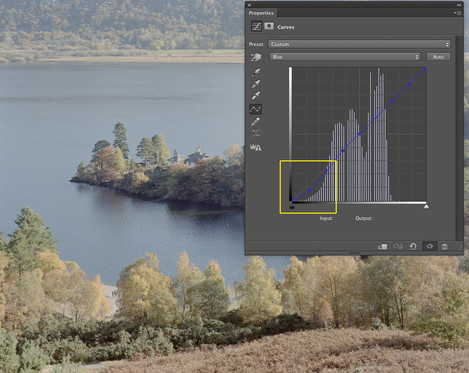
Set the clipping levels to 9% for both black and white and then if you click on the 'Shadows' and 'Highlight' colour sample you can select the level of grey to clip to. This should produce an image with no blocking of shadows or clipping of highlights. Ensure you don't set a colour for the shadow or highlight sample - you can make sure this happens by clicking in the colour area and dragging to the left before letting go of the mouse button.
At this point you might not have a 'full histogram'. You can add another curves layer or levels layer to set the black and white points without clipping. See here for more information.
Adding a Colour Correction Layer
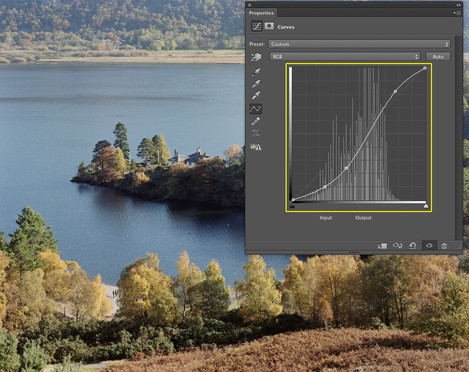
Making targetted adjustments to the highlights and shadows in Photoshop isn't easy given the default tools. Colour balance has highlight and shadow selections but they are very broad selections. In order to manage this we are going to create a curves preset that divides the RGB curves into multiple sections. You can do this roughly by hand and then tweak the actual numeric values. As long as the numbers match for each point on the curve the preset won't make any changes.
Once you have this preset saved (look at the video or click here for more info) then you can add this layer to your image.
Add Contrast and Basic Colour Balance
You should then add your overall contrast curve adjustment to get your picture looking in the right ballpark. You can make some broad colour balance adjustments here if you wish too, I use either a curves adjustment layer and use the middle eyedropper, sampling areas around the picture until I get roughly the look I want or I use the colour balance tool. See the attached video for examples of these uses.
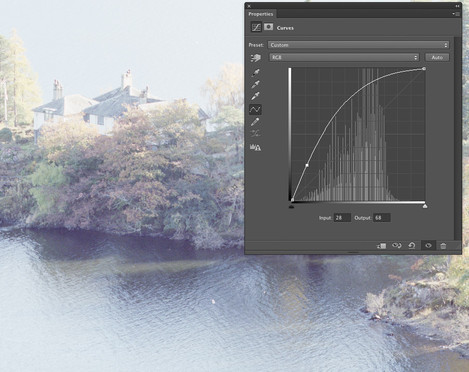
And add a final layer on top to boost the shadows significantly.
This final layer allows you to see what colour cast we have in the deep shadows.
Make Shadow and Highlight Colour Cast Corrections
You can then select your colour correction layer and make your curves adjustments to neutralise the cast. You can do the same with the highlights by darkening the image dramatically. Again for more information check the video. You can apply changes just to the very deep shadows by selecting the bottom point in your multi-point curve. If you want to expand the effect to brighter areas either use the bottom two points or delete one of the bottom two to get a smoother curve.
Video Examples
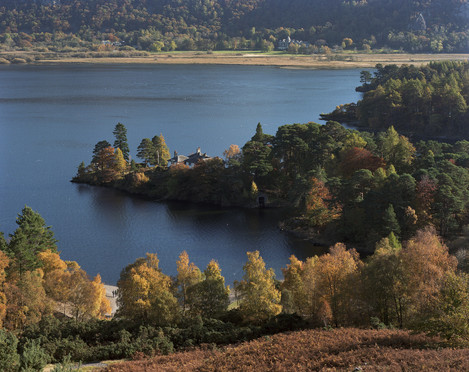
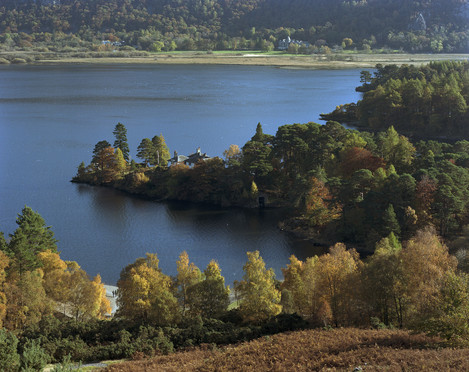
We've made a video showing a couple of examples of this technique. It's a little rambling but each image has it's own idiosyncrasies and I talk through techniques for addressing them. The video shows a comparison with the standard 'set black and white point' conversion technique that sometimes gets close but which, I have found, typically is unsatisfactory. Please let us know if you have any questions. Here are a couple of examples of inversions from the article. First the Derwent Water shot.
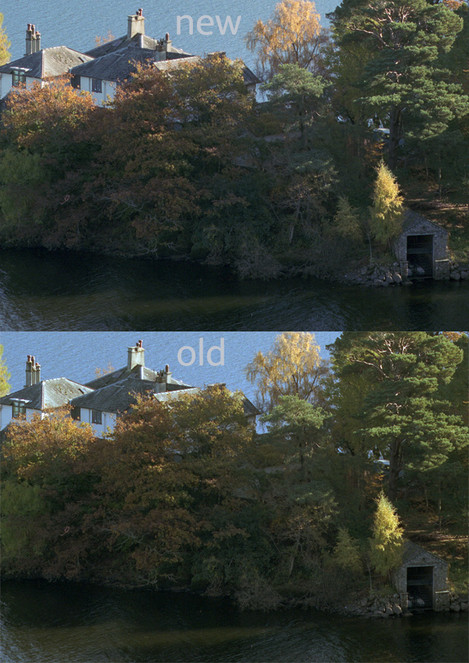
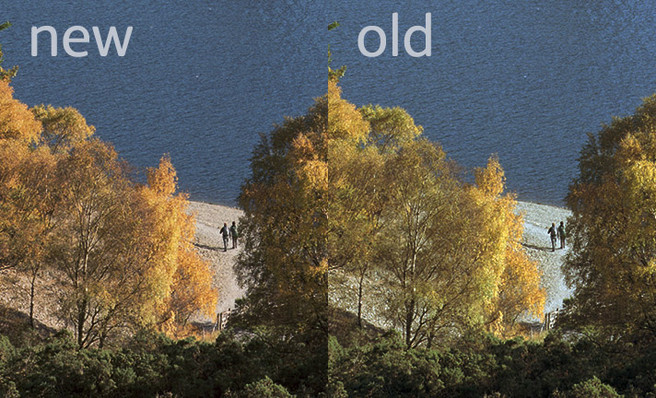
And here are a couple of detail crops. You can see that the old method has neutralised the red cast in the extreme highlights by adding cyan but this cyan cast has affected the rest of the highlights. The same goes for the shadows where the old method has neutralised the blue cast in the shadows completely but in the process of adding yellow to do this it has affected the rest of the shadows. Also, the blue cast should really still exist in the shadows to some extent as the light is coming from the blue sky.
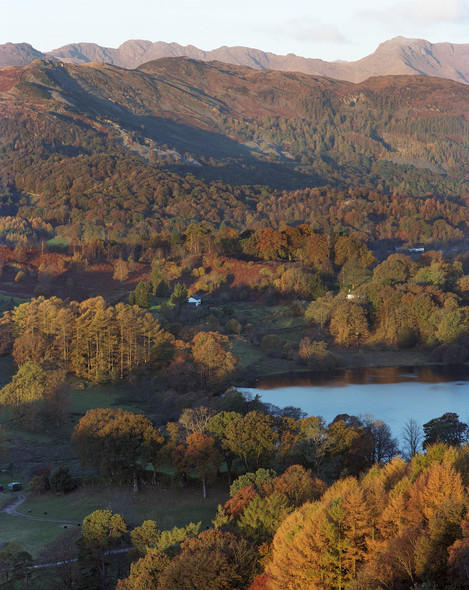
Here are a couple more inversions.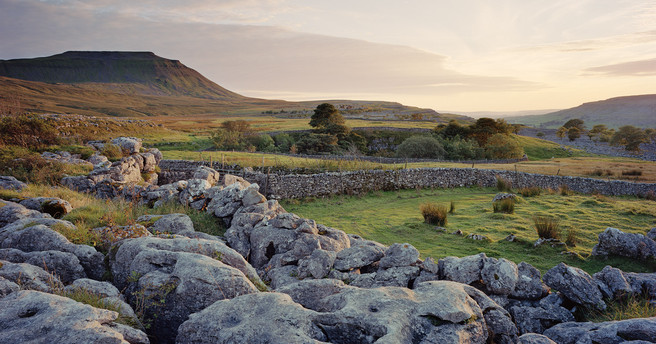
You can download sample files here
Loughrigg Old / New / Extra Post Processing
Ingleborough New
And finally here's the video content.


