A follow on article to 'Walking With Giants'
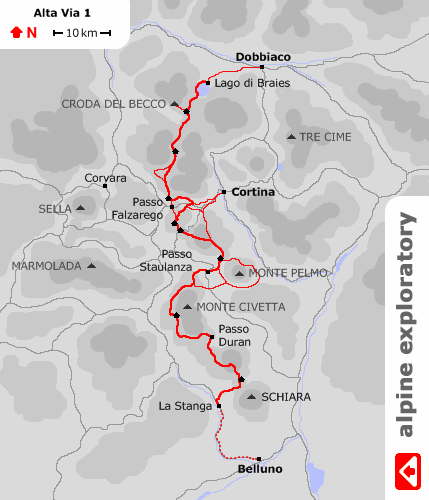
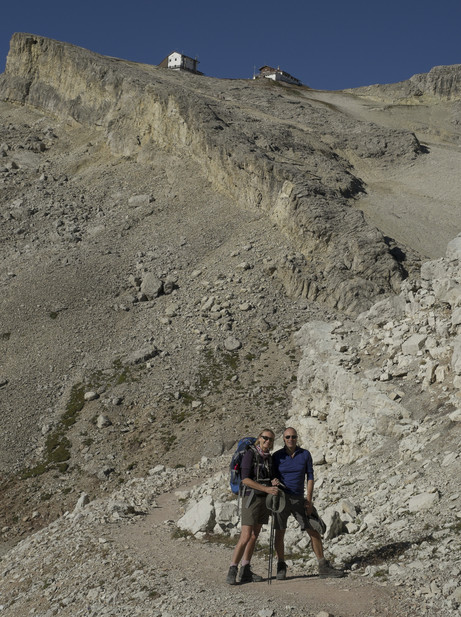
This is a follow on article from the ‘Walking with Giants’ article looking at the images captured and the equipment challenges faced by the serious photographer when undertaking a formidable walking adventure. My wife Ros & I almost immediately signed up for ‘more of the same’ in 2013 by booking another famous long distance trail in the Alps – the Alta Via Uno (AV1). As the name suggests this is an Italian walk on a North to South traverse of the Dolomites from Dobbiaco in the North to Belluno in the South over 11 days. Purely based on logistics this meant tagging a couple of days in Innsbruck on the front and a similar in Venice on the end. The principal difference this trip is that we had several multi day walks where we would not be reunited with our bags and stay in Mountain refuges. 35lt bags became 50ltr bags and the weight challenges grew to make the decisions on photographic equipment more important... Typical days were in a distance of around 15km and with up to 1500m of ascent/descent. Again we booked self guided through Simon at Alpine Exploratory who provided all the necessary expertise and support and walked with two good friends.
One of the key takeaways from the 2012 Tour De Mont Blanc was that for all practical purposes the Nex 7 was well above pareto for IQ and usability for this type of tour and the D800 (and definitely Large Format) was not needed or required. Ros and I both wanted to use CSC cameras with viewfinders (due to the brightness in the Summer Alps making a rear screen impractical on its own). This necessitated buying a new body.... A Nex 6 would have been the logical choice but my interest had been piqued by the Fuji X series and the X-E1 in particular. The zoom lens had a good reputation and JPEG output purportedly excellent – seemed like a perfect camera for Ros (ahem....). Tragically she hated the Fuji due to its size and lack of grip – its significantly bigger than the Nex so I ended up using the Fuji and was able to do a thorough extended trial both home and away. This article will provide a distillation of my views on the Fuji vs Nex systems as they stood in Summer 2013 and some pictures from some of the finest scenery in Europe.
Prologue – Finalising the kit list
I picked up an XE1 and 18-55mm zoom lens secondhand with spare batteries and case which enabled me to perform some preliminary testing vs the Nex 5n and Nex 7. I had high hopes for the JPEG output and for the quality of the zoom lens.
I immediately had issues with watercolour effects on bright OOF foliage that is well documented on the web, more of that later but I couldn’t believe it was so bad straight out of the camera and very much evident in RAW. JPEG output was disappointing compared to RAW and I abandoned it pretty quickly, colour (particularly sky blue rendition) being my main issue. The first compromise here as the JPEG output did suffer less from watercolour effects. Initial lens testing was not out of line with reviews but perhaps I wouldn’t be so gushing especially at 18mm end in the corners which never really sharpened up (I had a second sample which was the same). A refurb 35mm and 60mm macro from Fuji UK on the other hand transformed my view on the quality possible from the camera. Suffice to say that the 35mm lens is (or was perhaps as the 23mm is supposed to be better) a jewel, Leica like quality with a beautiful drawing of the image that MTF charts just can't articulate in a small package for little money in today’s camera terms. 60mm lens equally good in terms of ability to render detail but a complete b***** to use in AF mode even with the latest firmware. I venture to suggest that these 2 lenses alone are worth buying the system for if.. you can live with some of the limitations. I used LR5 latest converter for the image management and conversion (a point which is relevant and I will come back to).
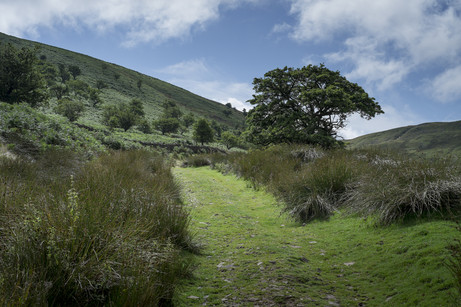
A walking weekend in the Brecon Beacons confirmed the kit list with Nex 7 / 24mm Zeiss, 50mm Sony as one system and the Fuji X-E1, 35mm and 60mm lenses as the other. Tripod remained the Feisol CT-3441 with the addition of a Novoflex Q mount mini release clamp to the Novoflex Ball 19. Lee RF75 filter set was left at home due to the good DR of both cameras and the ability to bracket if really desperate.
The Execution – the walk....
The walk was, at times, the hardest thing I have done in my life yet within a few minutes offered some of the most stunning scenery and light. The Dolomites are very different to the Western Alps in ways I hadn’t appreciated, they are tough and unforgiving, mainly sharp rock and scree. White rock and high altitude Italian sun were at times like I imagine Death Valley to be, no wonder many of the valleys had ‘al forno’ (or oven) in the Italian name. A lot of the time photography took a back seat and during the major part of the day, the light and conditions were just too harsh. We had conditions from 30c to sub zero in the space of a week and were forced to abandon the last day due to snow and storms over the high altitude pass we needed to walk. Not a photographer trip this one! Our walking partners left after 4 days as a result of one particularly punishing day under extreme conditions.
The Photographs...
I’ll use the photographs to illustrate the pros/cons of the 2 camera systems as I see them from my perspective:
Innsbruck Gardens in the Rain
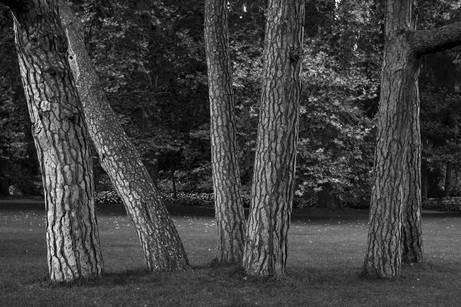
The first image I was pleased with from the trip. I knew that the XE1 and 35mm lens would capture the glow of these pine trees in the rain. It illustrates the lovely characteristics of the Fuji rendition and the almost Leica like quality of the 35mm lens at its wider apertures (this was shot at F4).
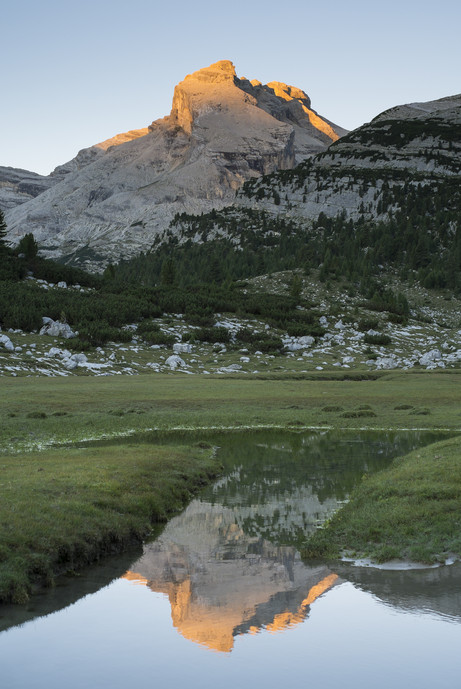
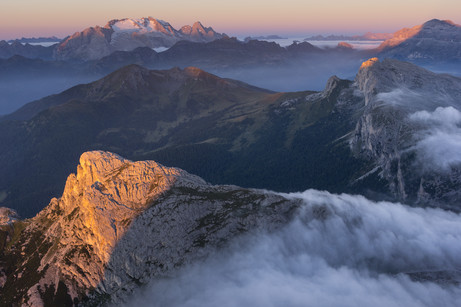
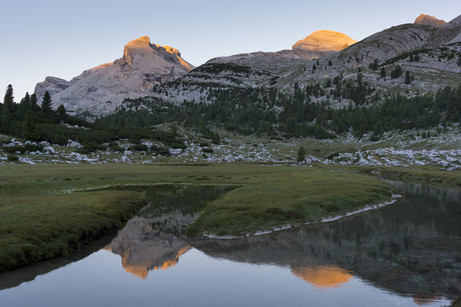
Dawn from Rifugio Gran Fanes
A somewhat problematic day with us arriving at our Rifugio to find that we were the last in and our rooms had been ‘lost’ meant an extra 1hrs walk (uphill !) yet turned out to be one of the best experiences we had. A night on the floor in the roof space of a farmhouse shared with 3 young Germans and 2 Belgians (all male and skinny dipped in the river at 2000m !!) was not in the Michelin guide to the Dolomites but nevertheless, the view from the balcony was stunning over this high pasture. You forget that dawn at this altitude in September can be very cold.. but nevertheless, I got up for dawn down on the river flood plain.
This image illustrates some of the issues I repeatedly encountered with the conversion of RAW files. Even with no noise reduction, there is clearly a lot being applied to the areas of plain rock. The camera and lens can resolve a phenomenal amount of detail, that rock should not be as smooth as butter – Fuji raw files and Dolomites rock faces did not get on.... We’ll talk about pine trees and Xtrans later. It was shot at F2.8 but aside from that it is very sharp and detailed across the frame.
The image shows an artefact white line 1 pixel wide or so on the orange blue interface of the mountain that has the alpenglow. It is not a sharpening or any other post processing introduced (shadow/highlight historically being a bad culprit) artefact. It is present whether you convert in LR or Capture One or in camera and can only be found on some orange/blue sharp interface boundaries. It is not CA as far as I am aware. Also, present but to a much lesser extent on the Sony images. Interesting but a PITA nevertheless.
Rifugio Lagazuoi – Photographers Paradise
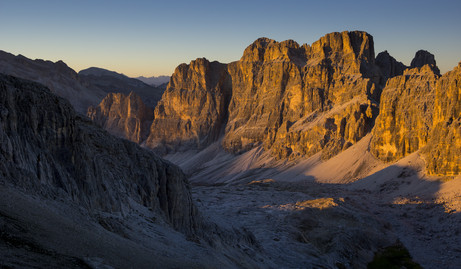
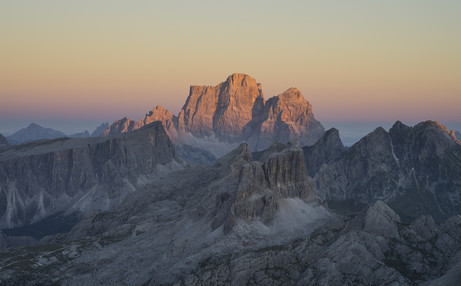
I can safely say that I have not been to anywhere in the world with such stunning views, nor have I endured a day of such emotional and physical hardship to get anywhere! To arrive at Lagazuoi by walking up from Gran Fanes via Capanna Alpina means a day of approaching 2000m of ascent and 500m of descent over nearly 20km. The last 3km are through an unforgiving stone valley from 2200m to 2800m where we literally roasted under clear blue sky and 30c heat. The irony is that there is a cable car and as we stumbled wearily up past WW1 trenches and tunnels we were passed by energetic 3 year olds wondering where the ½ dead had come from! In WW1 more soldiers died here from the conditions than fighting and it was easy to see why. The look on some of the local’s faces was THE picture if only I cared enough to get the camera out. A restorative cold beer or two soon got the juices flowing again and the near 360c view of the entire Dolomites ranges in the setting sun was just unbelievable.
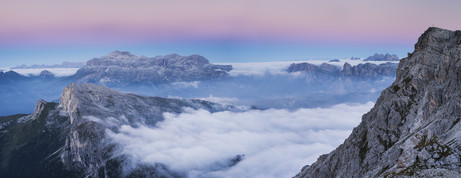
Dawn proved to be even more magical with a fabulous temperature inversion giving rise to rolling waves of cloud 100s of metres below our vantage point.
A bit of Alpenglow followed.
Analysing the images particularly from here did nothing to help swing the favour one way or other. The Fuji images consistently proved to be sharper with excellent contrast and rounded feel to them. As you can see from the pano the blues are quite awkward and the smoothing of the dolomitic limestone really not to my taste but the detail resolved is amazing. If you look at the full size image and see the detail in the cross top right. In the Fuji version of Figure 8 there are tiny people and a cross on the peak bottom left and they are resolved with total clarity.
This proved to be the high point (no pun intended) of the trip photographically with weather seesawing from too nice to horrible by the end.
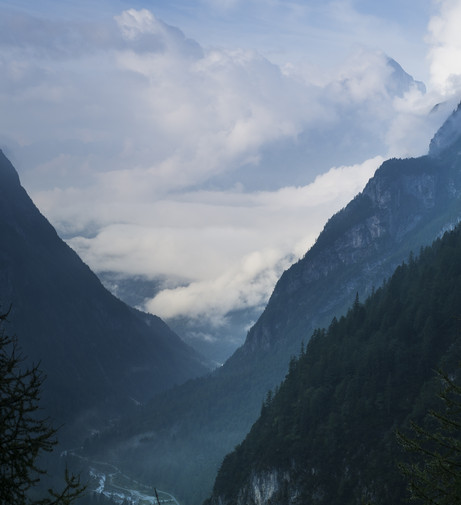
View Down Val Corpassa towards Agordo
A couple of poorer weather days gave a break in the photography. What proved to be our penultimate night in huts was taken at Rifugio Vazzoler, a delightful and charming place set amidst an alpine garden and forest. A welcome retreat after another 20km day walking up to and then through a high valley beneath a towering rock peak. An early start with a poor forecast again led to a vantage point looking down Val Copassa. Mist ebbed and flowed and the light had a soft translucence to it quite out of character with the rest of our trip. The scenery had steadily become what I considered to be more Alpine rather than Dolomitic!
This is one of the images I took with the X –E1/35mm combination that really is a testament to the very highest level of sharpness and detail that can be produced. I hate to talk about pine trees again but these are perfect and resolve every detail because they are not backlit or covered in specular highlights.
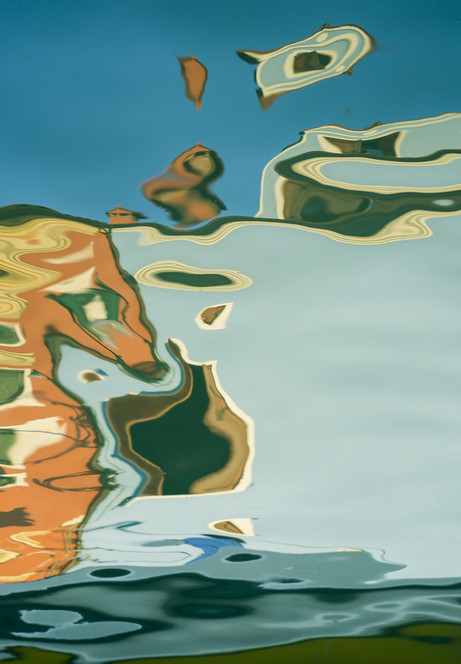
The last few days of the trip and Venice, in particular, were somewhat spoiled by an illness that Ros and I picked up but didn’t prevent us from enjoying Burano on which we stayed for the first time. A place famous for its multi coloured houses and rippled canals. Getting images that work with reflections is surprisingly difficult as they constantly move and AF isn’t terribly useful.
Fuji vs Nex?
I actually suspect that this comes down much more to a discussion about Xtrans vs Bayer and how the respective technologies and software choices fit into your existing workflow or become a new one. Starting with Xtrans felt to me like turning the clock back 10 years where the choice of conversion process was key and each image tended to need individual attention. I have been using Lightroom since its pre-birth as a non Adobe product and know how to get what I want out of it and how to use my camera in a way that gives me a RAW file that can be made to sing. Nothing different to knowing your Velvia or Provia or when to reach for neg film in pre digital days. All sensors are not born equal. In recent iterations, I have been able to move seamlessly with small learning curve between M 4/3, Nikon, Canon G and Sony products and they behave basically the same (except the Canon – all Sony sensors I suspect). Not so with the Xtrans. So what have been the issues?
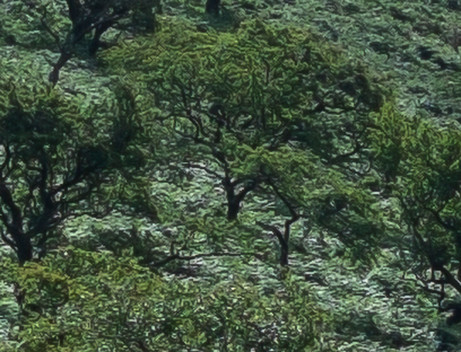
First up and of most significance to Landscape photographers is the way fine detail that has specular highlights is rendered, especially green tones. The impact is most noticeable on wet grass, pine needles and bracken in my experience but does manifest itself on any brightly lit leaf. It only comes into play when the size gets down to the small number of pixel territory ( I haven’t measured it) and especially if the object is partially OOF. Middle distance backlit pine trees, grass and bracken are dead certs. Lots of opinions on how to deal with it are available on the web. I found a combination of changed sharpening parameters reasonable effective but with impacts elsewhere or using a polariser giving near 100% fix. Some images are better with Capture One but I don’t have 10 years of experience with it so the rest of my processing was sub optimal. Many suggest alternative conversion software but I certainly stopped short of buying a Mac just to try Iridient. I had a bit of epiphany after more hours spent trying to tune some xtrans images that this was crazy to bring a product to market that wasn’t working perfectly with the market leader. I had a workflow, image management and backup strategy based around Adobe – like many others and it wasn't working well enough. A new version of ACR is in Beta at the moment with supposed further improvements but I haven’t tried it yet. There is an underlying problem as even JPEG conversion from camera shows the problem.
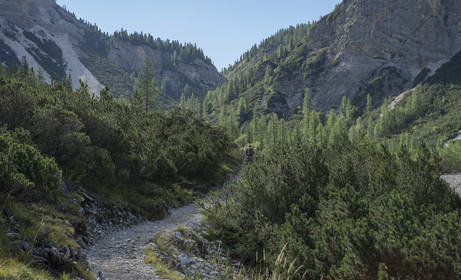
Looking at the first image – the best I can do with LR gives this image smearing around green specular highlights:
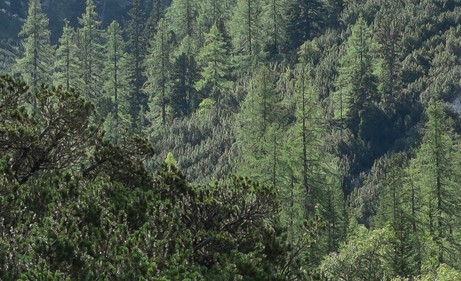
This is slightly enlarged from 200% but you can clearly see the sausage (or watercolour) effect on the trees and the bracken fronds.
A second example from this image:
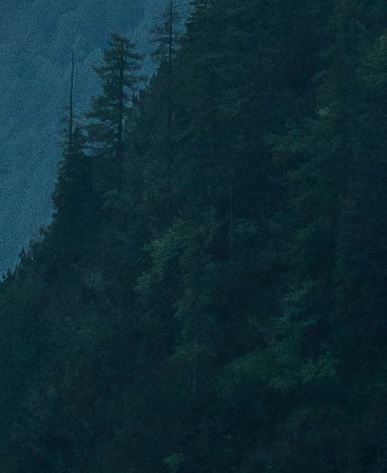
And the cutout from the central section just above the walker :
For practical purposes of printing, this issue may be irrelevant up to normal printing sizes but the effect spoils for me all the pictures it is present in and I modified what I took because I knew what I would get from the camera. I take a lot of contra jour pictures in woods with wet foliage, wet bracken and pine trees are unavoidable in the North of the UK!
YMMV (Your mileage might vary), two things may change the dynamic and hence the validity of this issue – upgraded RAW converters and I suspect more pixels will push the pixel pitch size that this occurs down to a point where it is irrelevant. The release of the non Xtrans X-A1 (and the original X100) has clearly shown for me that the X series doesn't need Xtrans to be a superlative picture taking camera system. As a final point – compare this to the pine trees in Figure 9 with no specular highlights:
Near perfection.
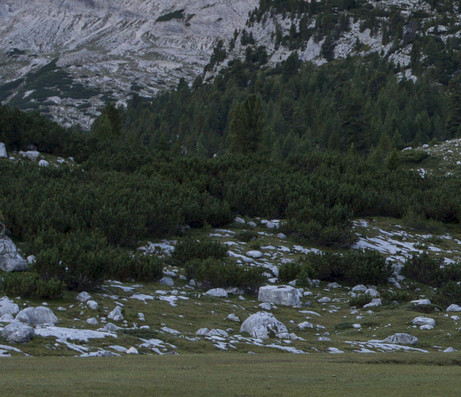
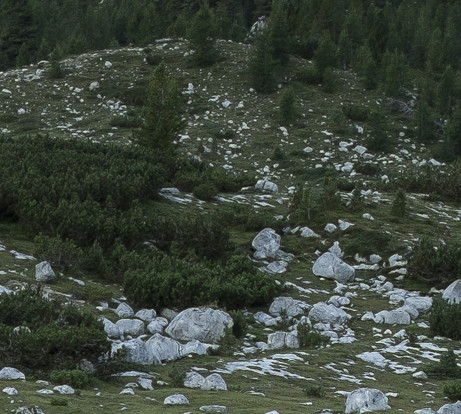
The second area is smearing which I had not really seen until I took the images in the Dolomites where smearing of the limestone occurs even with everything NR related turned off in camera and in Lightroom.
A comparison of some detail between Figure 4 and this Nex image might illustrate the point:
The cutouts:
The differences are very obvious at 100% with the Fuji looking quite plastic by comparison. The issue for me with it is that it is out of kilter with the detail that is seen in other parts of the same image and it's this difference that makes it uncomfortable. Look at the boulders – they are rounded unnaturally. The camera has noise reduction set to a minimum and none applied in Lightroom.
As before YMMV and printing on, for example, Matt paper may make the issue less of an impact. But why lose the quality the optical system and camera is capable of?
Handling and other quirks...
I haven’t talked about handling and ergonomics as its very personal, there are some subtle differences important to me. The most significant of these are:
- Sony doesn’t have remote capability except by wireless. Using the self timer works OK set to 2 seconds but you just cant beat a good old cable release or programmable electronic release both of which the Fuji will accept (electronic is the same as some canon cameras I understand). The new Sony cameras don't either but applications downloadable to the camera may partially fill the gap.
- The manual focus magnification is much easier on the Fuji being able to be operated by right thumb at the top of the camera on a wheel rather than the bottom on the Sony. You need to operate 2 buttons on the Sony, one for on, one for off. I haven't found a way of swapping the menu button to the bottom in the Sony.
- The Sony Nex is much smaller when adding an L bracket. There are no small L brackets available for the Fuji, I ended up using the same generic Arca bracket as for the D800. The brackets with removable grips were the same size.
Summary
Both are very fine camera systems that are well above 90% of delivering image quality fit for landscape purposes. I have highlighted what I consider to be the issues that after more than 1,000 frames of usage I struggled to deal with. The images presented are small illustrations and not meant to be exhaustive, I have done much more direct comparative testing with identical lenses in controlled conditions to be sure of my ground. In areas of Dynamic Range, both 16mp variants of the Nex and Fuji behave similarly except under exceptional circumstances where the Fuji loses its colour (goes to greyscale) when you recover very blown highlights but still with detail whereas the Nex doesn't appear to. I split the systems on the basis of the issues I brought out. Prime lenses for the Fuji are simply stunning, I added a 14mm lens and it has no distortion, sharp as a tack into the corners at F8 – amazing (see the image in the gallery). Fuji images stand out in Lightroom because of their rounded rich look which really pleases and people images are beautiful. In the end, the contra jour problem was a deal breaker and I had stopped taking images of a type I enjoyed because of the results from the camera/ process pipeline. Many photographers I have spoken to just aren't bothered by the issues that bug me and perhaps that is because I view this as a possible main system rather than a good P & S. The lenses are so good from the Fuji system that the loss of even a few %age points of quality from the top end is frustrating. In the end, I sold the Fuji system with much regret and bought a Nex 6 which I am thrilled with, some Leica/Zeiss glass gets me into the domain of the Fuji primes albeit at a significantly elevated price. Now with the A7/R and a Nex 7 replacement in the pipeline, the Nex line may be starting to come of age.
In terms of the walking, the AV1 was a different proposition to the Tour De Mont Blanc, unforgiving and not as ‘in your face’ beautiful. Apart from Lagazuoi I had fewer images that I was thrilled by – and you can stay there without walking more than 10 yards! I wouldn’t go back to the Dolomites unless they were softened by snow. Next year Zermatt but not on the Haute Route!
As a tip I really suggest keeping an eye on the refurb sites for both Fuji (in particular) and Sony if interested in these systems. As new products are available for secondhand prices with full warranty if you have a little patience. In this regard, Fuji are much better to deal with than Sony.

