Featured Photographer

Stuart Clook
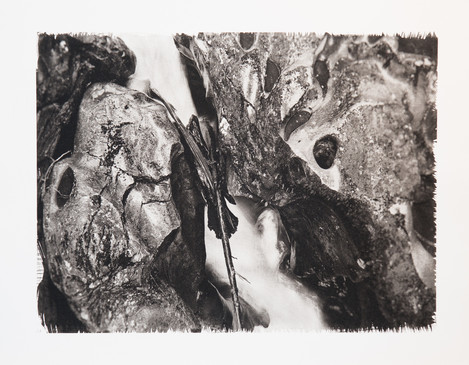
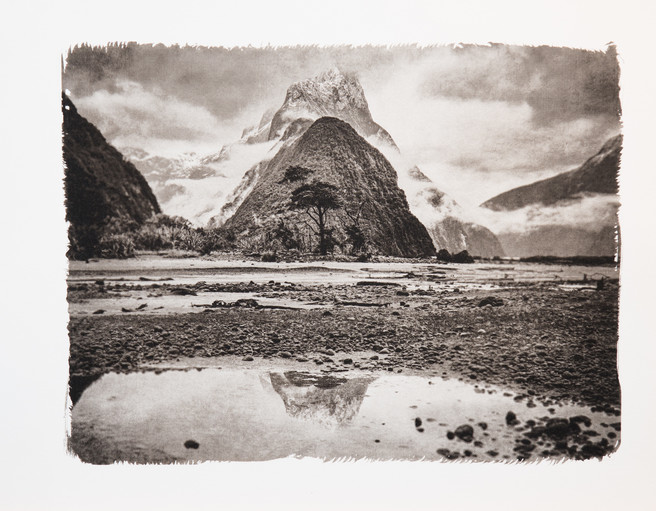
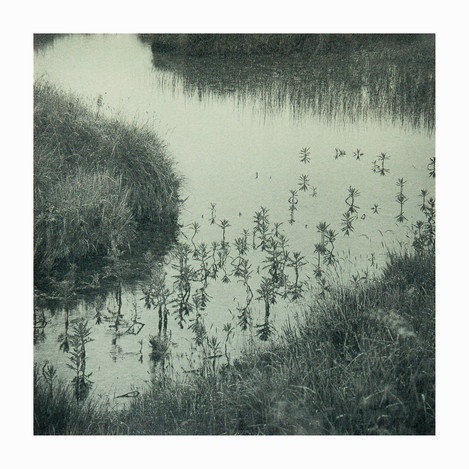
Like a small but growing number of photographers around the world I’m exploring Analogue and Alternative Photographic processes to help me express my thoughts and feelings about the landscape that we live, work and play in. These processes help me make my prints in a uniquely personal way and where I can use my hands in today’s digital and machine centric world. I love the fact that results are not guaranteed and that sometimes serendipity plays her part in the final outcome making for truly unique handmade photographic prints.

Michéla Griffith
In 2012 I paused by my local river and everything changed. I’ve moved away from what many expect photographs to be: my images deconstruct the literal and reimagine the subjective, reflecting the curiosity that water has inspired in my practice. Water has been my conduit: it has sharpened my vision, given me permission to experiment and continues to introduce me to new ways of seeing.
It’s interesting how circumstances can combine such that even if you have what others might consider to be iconic landscapes on your doorstep, your photographic curiosity takes you away from the obvious through a choice of composition, photographic technique, and/or print processes. Stuart Clook’s work mixes places beloved by 21st century filmmakers, audiences and adventurers with 19th century photographic and printing processes, exploring the way that colour can influence perception and deliberately making room for error and discovery. We had a taste of Stuart’s ‘Precious Landscapes’ for our subscriber’s 4x4 portfolio feature back in 2017 and as he prepares for his first solo exhibition of the work, we thought it would be good to find out more.
Would you like to start by telling readers a little about yourself – where you grew up, your education and early interests, and what that led you to do as a career?
I grew up and went to school in Llangollen, North Wales and from an early age, my interest and passion was fly fishing for trout and salmon in the local rivers and lakes. At 15 and 16 I represented Wales in the junior fly fishing team and had no thoughts for photography. I left school at 16 with a scholarship to go to Manchester and study Polymer Science and then continued my studies in London for a further three years before returning to North Wales to work as a material scientist in a new research facility for BICC cables. Seven years later, and a decision to go find some adventure, I decided to move to New Zealand. I have worked in various Manufacturing and Operations management roles for the past 25 years and now look after quality and regulatory affairs for a medical device company that designs and manufactures mobility equipment for adults and children with physical and mental disabilities.
How did you first become interested in photography and what kind of images did you initially set out to make?
I didn’t pick up a camera until moving to NZ, and then only as a way to record my fishing and tramping adventures using a disposable waterproof camera that took 24 pictures. Very much a point, shoot and wind on. I would drop it off at the local camera store and pick up my negatives and prints a week later. My photographs of smiling faces and big fish were just that and were great for keeping memories and for bragging at the local fishing club but I was never really satisfied with my other photographs of the rivers, valleys and incredible scenery that I was fishing and camping in. Coming from a similar size country with some 55 million people to one with 3.6 million and with only a third of those living on the South Island the landscape is huge in comparison.
What’s your local area like and which places are you drawn back to, time and again?
I live about 20 minutes out of Christchurch over the Port Hills at the top of Lyttelton Harbour on Banks Peninsula. Banks Peninsula is the remains of two long extinct volcanoes that have been claimed by the sea resulting in two large harbours with numerous bays and coves. I enjoy photographing along the coastal tracks and on the tops between the bays where there are what remains of native bush and totora forests that had not been totally cleared by the early European settlers. An hour’s drive away is the Southern Alps, a mountain chain that runs the length of the South Island. Here there are beech forests and alpine meadows in the valleys and rivers and lakes that drain the year round snow covered mountains. I make many day trips into the mountains exploring new ground and revisiting familiar places at different times of the year. I especially enjoy making longer trips in the autumn and winter when the light is not as harsh as in summer and when there is a good chance of a gathering or clearing storm.
What changes have you observed – for good or bad – as film and social media have popularised the landscapes of New Zealand?
I have been in NZ for 25 years and yes the numbers of visitors has increased significantly in that time. I don’t see it as a bad thing; the dollars the visitors bring with them are a big part of our economy and our walking tracks and back country huts are being renovated and improved as a result for the enjoyment of all us, locals and visitors alike. NZ’s South Island is still largely unpopulated and with the extremes of our geography there are not many roads to get around on, hence it can be quite crowded and busy and is why you see a large number of images on social media that are of the same scenes and locations. Recent films like the Lord of the Rings and The Lion, Witch and the Wardrobe have only further raised the number of visitors coming and as a result there are visitors and tour groups jumping from one film location to the next and it is not uncommon to have dozens of tripods and cameras clicking during peak times in the iconic locations and roadside rest areas. This does of course make it difficult if not impossible to make a unique photograph of the scene without being influenced by those you see on social media or in magazines and is actually one of reasons I started to look at other ways to make my photographs and particularly in the printing of them.
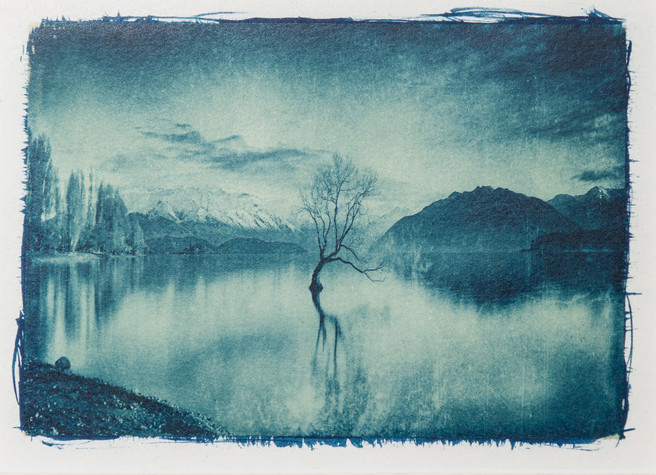
One of the images you have chosen for this interview is of the Wanaka tree and is a good example of this. This tree has been photographed thousands if not millions of times and I can hear my kiwi friends groaning at ‘not another Wanaka tree’ image. This photograph was taken several years ago when I first started to explore alternative printing techniques and it really helped to open my eyes to what is possible.
Who (photographers, artists or individuals) or what has most inspired you, or driven you forward in your own development as a photographer?
The artist and writer Austin Kleon writing on how to be more creative published a book titled ‘Steal Like an Artist’ and - along with a quote I have written up on a ‘post it’ note above my desk from the film director Jean Luc Goddard, who in a response to criticism he received for a new film said “it’s not where you take things from, it’s where you take them to” - it is very much my philosophy when looking for inspiration and new ideas. I will dive down all sorts of rabbit holes, be it in camera techniques and gadgets, to variations in the printing processes I am using, to completely new printing processes.
When I first started making ‘serious’ pictures I would find ideas and inspiration in the photography and art books and magazines in the local library. A couple of photographers that were a great inspiration at the time were Peter Eastway, Andris Apse and Craig Potton who set a very high standard to aim for in terms of composition and technical excellence.
My appetite though to take my photography to a new place led me to explore the historical and alternative printing processes. The change from chasing so-called technical perfection and the precise nature of digital processing and printing, to a hands’ on and often long process of nurturing a print through successive printing exposures and development, to finally holding something that has a unique beauty is extremely satisfying.
I’m learning about and making full use of what’s called the photographic syntax. This is not just the choices made with the camera as to the subject, composition, lighting, contrast, colour, etc., but how the physical print materials and tools influence the final result. For example, how the choice of paper and texture affect the way the light reflects off the print surface and the type of brush used to coat the paper. I am discovering a whole new way to help me express what I see and feel.
Have there been any especially decisive moments for you or has anything changed your relationship with the camera, or your approach to photography, over time?
A key decisive moment in my printing has been to let go of perfection which was a hangover from my digital processing and printing days. I spent far too long when I began using these Alternative processes in making step wedges trying to achieve a ‘perfect’ calibration between my digital negative and the final print. Making my first prints with a ‘good enough’ calibration and feeling my skin tingle as the image appeared through the developer was all I needed to give up on step wedges and start making real prints.
Another ‘ah-ha’ moment has come recently with the move to using a medium format and a large format film camera. The isolation from the world when using a dark cloth or waist level viewfinder has made an enormous difference to my composition. You become completely absorbed in the process, much more so than when viewing a scene through a DSLR viewfinder. These are also fully manual cameras and I really enjoy the problem solving and mental gymnastics that I go through, working back and forth between how I think I will print the image and working out the exposure I need using an old Minolta spot meter. It doesn’t always work out as intended but that again is all part of the enjoyment of it to me.
Would you like to choose 2-3 favourite photographs from your own portfolio and tell us a little about why they are special to you?
Well this is really hard, but if I look back over the last several years then these prints are very much like mile markers in my understanding of how to use them in finding my “voice”
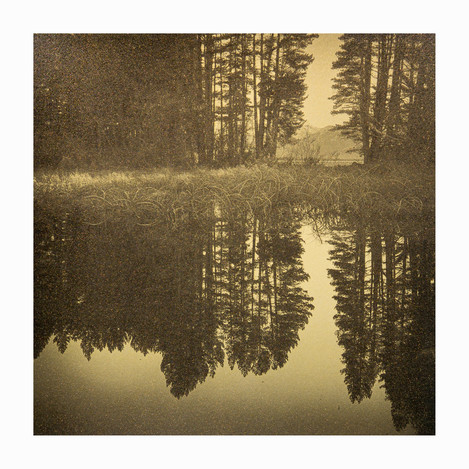
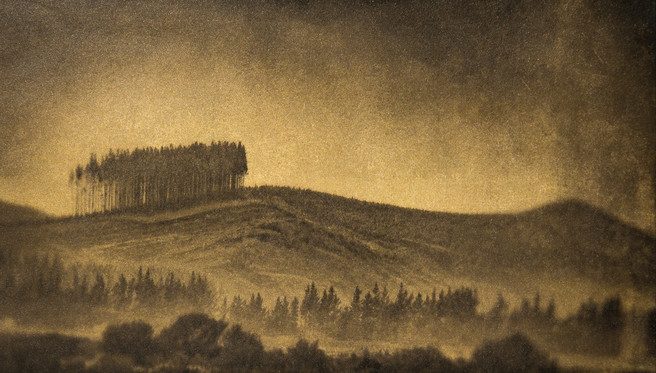
Marching trees
My first really satisfying print using the style of the Tonalist painters and selecting a colour to help create a mood in a print.
I was exploring the bottom of the South Island in my small camper van in late winter. The photography had been good and I was pleased with several images I had been able to capture. On my last full day, the weather had turned pretty foul with a full on southern storm and knowing it would be another day at least before it started to clear I decide to head for home. A few hours later I could see on the distant horizon a series of pine trees along a ridgeline and they looked very much like they were following each other. As I drove closer, I knew I had to find somewhere to stop and see if could make something of them. I ended going up and down a 400m stretch of road several times before finding a farmer’s gate that provided just enough room to get off the highway. As it was raining heavily I decided to set up the tripod in the back of the camper van and open the sliding door on the side of the van. With my longest lens at 200mm and timing my exposures in between gaps in the traffic to minimise vibration, I made three or four exposures. On returning home and processing them through Lightroom and Photoshop as normal I then used a new technique that I had come across for making duotones for the gum bichromate process. This is similar to split toning where you can add a different colour hue to the warm and cool tones in the image. This is done by using the channels function in PS to split the RGB image into it's component Red, Green and Blue greyscale separations. The Red separation is used to make a digital negative for the cooler tones for printing with platinum and the warmer tones are printed using yellow pigments and the gum bichromate process with a digital negative made from combining the Green and Blue separations.
The final print is a platinum print with several layers of gum printed in registration over the platinum to build up the colour and depth in the image. I also used a yellow pigment that contains mica in the last couple of gum layers so that as you view the print the specular highlights from the mica bring the print to ‘life’.
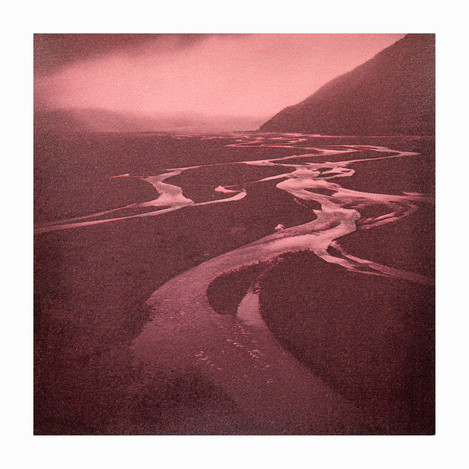
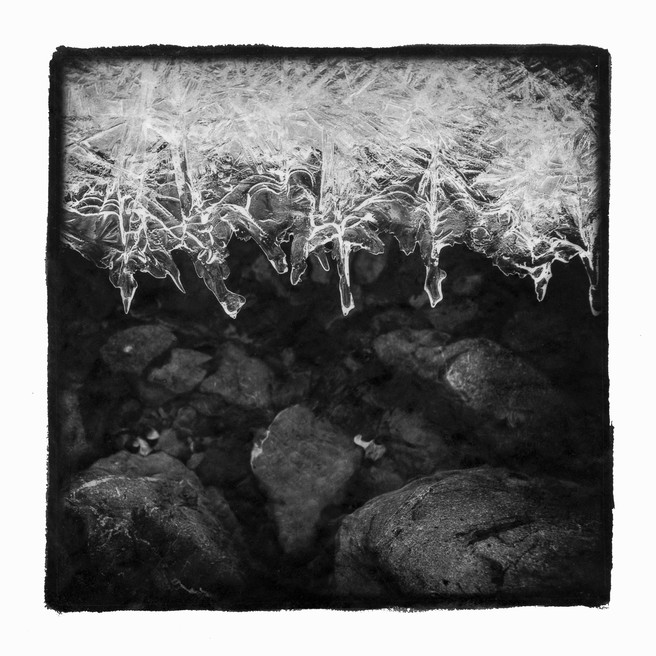
Icy grasp
I have lots of failures in what I do and this series of prints and this one, in particular, is a reminder to me that persistence can pay off in the end.
This is a platinum print on vellum with silver leaf gilded onto the back of the vellum. The image is of a small stream in mid-winter that makes its way down a scree slope towards the main river a km away in Canterbury’s High Country. The stream is no more than 5 or 6ft across and at its deepest maybe only 12 inches, and I could see that it was freezing at night and thawing during the day depending on how warm it got. This cycle must have been going on for several days or longer and the resulting ice patterns were like windows into the depths of the icy world below. I had my Bronica with me and with its square frame I had a ball and used up a whole roll of film making 12 exposures in all.
Printing onto vellum (which by the way is made from plant materials, not the traditional animal skins) is technically challenging and even now I never quite know if it’s going to work. As soon as you apply the liquid platinum salts to the vellum it starts to buckle and roll up like a scroll. I have made many experiments and explored dozens of different vellums in trying to learn how to control and tame the vellum to make a print that I was happy with. After developing and drying the platinum print and once I have it somewhat flat again I then using guilder’s size to apply the silver or gold leaf to the back of the print. When this is then varnished the vellum becomes translucent allowing the silver leaf to shine through the lighter tones in the print and combined with the unevenness in the vellum surface it creates a three dimensional feel to the print.
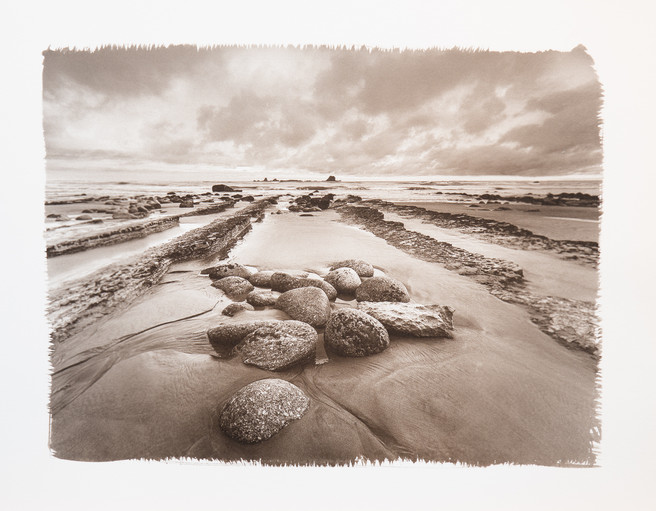
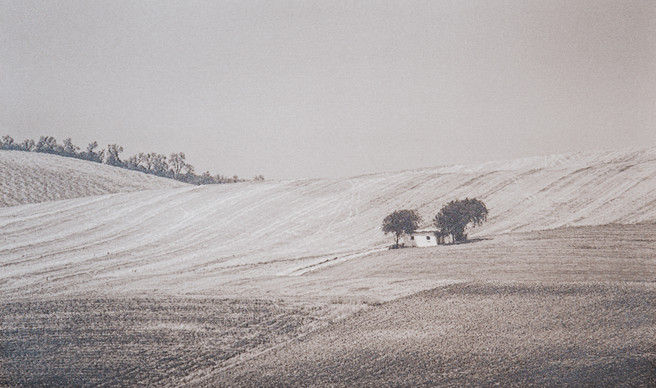
Andalusia
The image is from our holiday though Spain in 2017 with my wife Louise. The small barn was seen from a long way off across the valley in the evening and by the time I got back to the location the following day it was already well over 40degC and with a 200mm lens I made a couple of exposures. Several weeks later after getting back home I was ready to print and knew that I should use palladium only in the print and that with the right paper humidly during exposure I should get a warm toned print, perfect for how I remembered the day. The straight palladium print was very nice but by adding a gum print over the top and adjusting the ratio of pigment, gum, dichromate and exposure I could add additional depth and texture to the darker tones of the trees on the ridgeline and the shadows in the ploughed fields. This was perhaps one of my first successful uses of the gum process to target specific tones in the print to add depth and ‘richness’. I find the gum process to be one of the most creative processes I can use in my printing.
Which cameras and lenses do you like to use? Do you have a favourite format or film?
Up to around 2 to 3 years ago, I was using a Nikon D800e and my go to lenses were a 24mm and a 45mm tilt-shift and an 80-200mm f2.8 zoom lens. Today I am using film almost exclusively and I find the whole experience totally consuming and although frustrating at times it is highly rewarding and satisfying.
The two cameras I use today are a Bronica S2 from the early 1960s for which I have 3 lenses; a wide, normal and long lens equivalent to 28, 50 and 110mm on a full frame sensor. It produces a square format 6x6cm negative and I love it. If I want to, I can put the main subject of the scene in the centre and use the symmetry of frame to help with my composition to focus the viewers’ attention and not worry about thirds or golden circles etc. I have earlier this year bought a 4x5 Chamonix large format camera. A gorgeous camera made of teak, aluminium alloy and carbon fibre and also the lightest camera I have ever owned. It has asymmetrical movements on the rear standard which along with its reasonable price was the main reason I chose it. These movements make it a lot easier and quicker to control depth of field in the image, particularly if I’m in a hurry when the light is changing, and although I have only been out with it half a dozen times so far I am really enjoying getting to know it.
Film wise I only use black and white film and mostly Ilford’s Delta 100 due to its low reciprocity which helps keep my exposure times to a minimum.
How popular are analogue and alternate processes in New Zealand?
Film photography like most everywhere is having a resurgence, particularly among the younger generation. We have a couple of new film labs popping up in our two largest cities and we even have a small group of dedicated enthusiasts raising funds to set up a community darkroom in Queenstown. As far the alternative or historical processes go, I would say they are still very much off the beaten track and perhaps seen as a little eccentric.
I provide a platinum printing service to other photographers and artists and I have also started delivering workshops in the last nine months in using digital negatives with the cyanotype and platinum process so there are a small but growing group of fellow kiwi practitioners.
For readers who are not familiar with alternate processes, can you give them an idea of what they offer and what is involved?
The majority of the alternative processes are contact printing processes that use a negative of the image that is the same size as the final print. Most people use Photoshop to make the ‘digital negative’ and print it onto an inkjet transparency or photo paper using an Epson or Canon printer. Depending on your chosen process the light sensitive chemicals are measured out and mixed following a recipe. This is then brushed onto your chosen paper or substrate and allowed to dry in the dark. The digital negative is then placed on top of the dried sensitised paper and held tightly together using a sheet of glass and clamps and exposed to UV light, either by placing it outside on a sunny day or inside using UV lamps. Once the paper has been exposed it is then developed, washed and allowed to dry.
What would you suggest to those who would like to try some of these processes but are put off by their perceived complexity or cost?
These processes are not necessarily expensive; yes if you go straight to Platinum and Palladium then these are at the expensive end of the spectrum but there are many processes like Gum bichromate, Cyanotype, Kallitype and Salt printing that use very inexpensive materials.
To really get a good understanding of what is involved and to see if it is for you with a minimum of the cost I would strongly recommend a workshop. This will not only save you money, but considerable time and you will come away with a good understanding of what is involved and several finished prints to review and hopefully enjoy when you return home. If you are handy with some basic tools you can make a lot of the equipment yourself. For the UV exposure unit, you can find DIY plans on the internet or like me find a second hand sun tanning bed in an online auction for no more than the cost of a Sunday lunch.
You refer to the fact that with the techniques that you use, results are never guaranteed. Is the margin for error from something that you can’t wholly control and the chance of serendipity part of their appeal to you?
I love the fact that it doesn’t always go to plan. It’s a big part of the creative process for me and makes each print unique. I’m also working with chemistry that is affected by many variables, for example, our water at home comes from a volcanic spring about 1km up the valley and it can change in the level of iron and calcium impurities which interfere with some of the processes I use. If it’s really bad, particularly if I am making cyanotype prints, I will collect water in several 25 litre tanks from the nearest petrol garage in Christchurch for processing my prints. Finding solutions to problems can often take me in different directions.
You have a couple of forthcoming exhibitions, including a solo exhibition. What work will you be showing for these and where can people see your prints?
Yes, I’m very excited and yet full of dread and self-doubt at the same time. These are my first shows on my own and I will be exhibiting prints from the last couple of years. The first one is in July at Chambers Art Gallery in Christchurch and then in September and October at Gold Street Studios which is about an hour north of Melbourne, Australia. These will all be New Zealand landscapes printed in platinum/palladium, cyanotype and gum bichromate. I also have an exhibition planned for July next year at Photospace Gallery in Wellington where I am also planning to run a couple of print workshops to accompany the exhibition.
Do you have any particular projects or ambitions for the future or themes that you would like to explore further?
My vellum prints are a larger body of work that is slowly coming together. Finding the right image and conditions means it will be one of those projects that will likely keep running in the background.
If you had to take a break from all things photographic for a week, what would you end up doing?
I haven’t been fishing for probably three years and have recently promised an old friend that this season coming he needs to come and rescue me from my garage darkroom and go bush.
And finally, is there someone whose photography you enjoy – perhaps someone that we may not have come across - and whose work you think we should feature in a future issue? They can be amateur or professional.
Well, this is really a hard one as there many great landscape photographers. Looking at my bookcase I see several Joe Cornish and David Ward’s but I also see New Zealand’s Andris Apse and Craig Potton, two great traditional NZ landscape photographers. Andris goes to enormous lengths and planning to photograph the NZ wilderness and will have many stories to tell you. For someone a little more contemporary I’m sure you will also enjoy viewing and reading Tony Bridge’s insights and landscape photography.
Thank you, Stuart, and good luck with the exhibitions.
Stuart will be showing ‘Precious Landscapes’ at the Chambers Art Gallery, Christchurch, New Zealand from 9 – 27 July 2019, and at the Gold Street Studios in Victoria, Australia, between 28 August and 27 October 2019.
If you’d like to see more of Stuart’s work, his website can be found at http://www.labrettophotography.com/
[/s2If]

