IQ180 Phase One Medium Format Camera Back versus 10x8 film camera

Tim Parkin
Tim Parkin is a British landscape photographer, writer, and editor best known as the co-founder of On Landscape magazine, where he explores the art and practice of photographing the natural world. His work is thoughtful and carefully crafted, often focusing on subtle details and quiet moments in the landscape rather than dramatic vistas. Alongside his photography and writing, he co-founded the Natural Landscape Photography Awards, serves as a judge for other international competitions. Through all these projects, Parkin has become a respected and influential voice in contemporary landscape photography.
Quite recently, Luminous Landscape ran an article by Markus Zuber discussing a comparison between the new IQ180 Phase One medium format camera back and a 10x8 film camera. The results surprised quite a few people because the IQ180 outresolved the 10x8 by quite a large margin.
The critics were quick to call the test biased and pile insults onto the creator. However, knowing how difficult it is to make accurate tests and having seen some 10x8 results, I had the impression that there were a few different complicating factors that made the results less than clear cut. Whilst myself and a few others were discussing the results on the Large Format Photograph forum, Markus (who helped with the original tests) expressed his interest in getting someone to scan his 8x10 transparencies from the test and I offered.
This article follows my thinking as I looked into the test and I hope to explain what may be needed if you are planning your own tests. We will touch on topics such as diffraction, depth of field and equivalent focal lengths and apertures across camera formats along the way.
But first, a bit of background, the comparison used the following equipment
IQ180 80 megapixel back (sensor size 53.7mm x 40.4mm = 10328 x 7760 pixels)
Phase 645 camera
– Schneider Kreuznach f2.8 / 55 mm
– Schneider Kreuznach f2.8 / 110 mm
Alpa SWA
– Alpa APO-Helvetar f5.6/60 mm
– Schneider APO-Digitar f5.6/120 mm
The 8x10 was an Arca Swiss using Ektachrome film (I haven’t looked the the black and white film but it was very grainy in comparison with the Ektachrome)
– Schneider Apo-Symmar 5.6/240 mm
– Rodenstock Apo Ronar 9.0/480 mm
The photographs taken were at f/32 for the large format and at f/16 for the Phase
I won’t reproduce a lot of the test here so wander on over to Luminous Landscape and read the original article to catch up.
Assessing the Test Conditions
Focal Length
Well the first thing I looked at was the lens equivalents and calculating these is not immediately straightforward. However, after a little thinking (and having done similar conversions before). I had to presume that the shots will be cropped to the same size. In this case it means cropping the IQ180 image, which is naturally 4x3, to almost 4x5 (the 8x10 large format film is actually 196mm x 246mm).
So what we end up comparing are the short edges of the sensors. Well the ratio of the two short edges is 4.85 and this can be used to work out lens equivalents. So, what should the lenses be for the 8x10 given the 55mm/60mm and 110mm/120mm lenses used.
55/60 is equivalent to 267/291
110/120 is equivalent to 533/582
So, given that the actual lenses used are 240mm and 480mm, we have an advantage to the IQ180 results as follows (in terms of linear resolution or pixels across the width or height)
- 55 = +11%
- 60 = +22%
- 110 = +11%
- 120 = +22%
A not insignificant advantage but one we can now allow for in the following calculations.
Aperture, Depth of Field and Diffraction
The next step is to look at the chosen apertures and to work out what implications these have on depth of field and diffraction. For great articles on both of these issues, take a look at Cambridge in Colour which has a very nice article on diffraction (http://www.cambridgeincolour.com/tutorials/diffraction-photography.htm) and depth of field.
We will look at the chosen aperture for the Phase and work out what the equivalent should be for the 8x10. Interestingly, the multiplication factor for this is exactly the same for that of focal length. So here are the aperture settings that should have been.
- f/11 on IQ180 should be f/53 (or f/45⅔)
- f/16 on IQ180 should be f/77 (or f/64⅔)
But we actually used f/32 on the 8x10 and so this has a large impact on depth of field.
To work out any depth of field, we need a good estimate of the distances involved. I’ll save you some maths here but in short I looked up the exact height of the Renault van, calculated how far away it would need to be to cover the same angle as shown in the pictures and Bob’s your uncle (as they say). The Van turns out to be about 25-30m away.
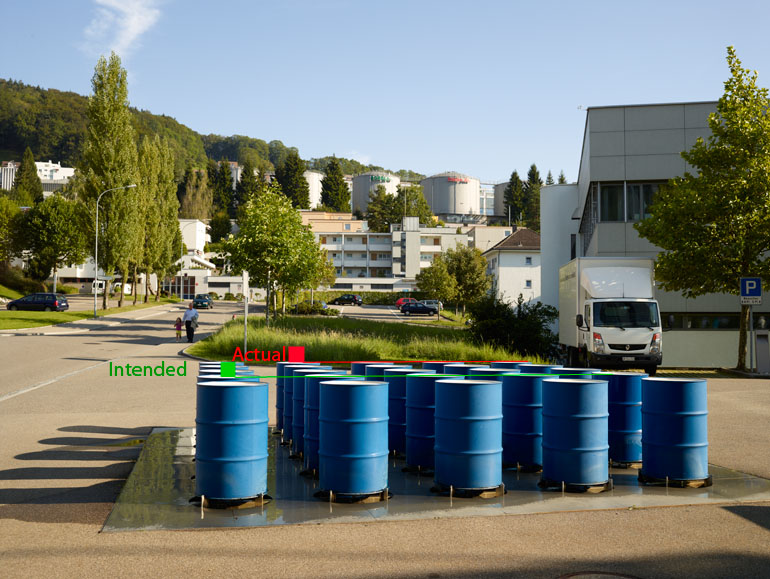
Talking to Markus, he said that they were focusing on the front of the second row of oil drums which I estimated to be about 15m away.
So, what depth of field can we get? Well, the first thing we should think about is how can we measure depth of field? I personally think it would be good to measure it in terms of number of pixels we could get in relation to the maximum resolution of the IQ180 (actually we’ll measure circle of confusion for these but that’s far too technical and not as simple to scan read). So the IQ 180 has 100% resolution on the focal plane when using an optimum aperture.
How much resolution can the IQ180 get at f/16? Skip the next paragraph if you don't care about the maths.
Well at f/16 the circle of confusion (based on airy disk = 21.3um and 2.5x factor as mentioned in Cambridge in Colour) is 8.5um so for a 40.4mm sensor we have 40,400um divided by 8.5um which gives 4741 so the Phase should render this number of pixels which works out at 61% of the maximum possible.
I won’t go through the rest of the figures like this but at f/16 you can get 61% of max and at f/11 you can get 88% of max.
At f/32 for the 8x10 we have a potential 150% of max IQ180 resolution [circle of confusion (CoC) of 17um which means a potential number of pixels of 196,000um (film size) divided by 17um = 11,500 pixels which works out as 150% of max IQ180]
In summary
- f/11 on Phase gives 88% of max
- f/16 on Phase gives 61% of max
- f/32 on 8x10 gives 150% of max
Now this presumes we are working on the exact focal plane but in actual fact, the number plate test is 15m away from the focal plane.
What we need to work out now is what the circle of confusion is at the number plate based on depth of field calculations. I’ve leave the maths of this one alone for a bit but you can use a website such as this (http://www.dofmaster.com/dofjs.html) and change the circle of confusion value in the first drop down (below all of the cameras) until the you get the right far limit of focus.
This turns out to be about 80um for the 8x10 at f/32 which means that instead of the 150% of max resolution, we have 31% of max resolution - quite a difference.
If we do the same for the Phase we get
- 55mm at f/16 the CoC is 6um which is less than the diffraction limit of 8.5um and so the resolution is still 61% of max.
- 60mm at f/16 the CoC is 9um and so the resolution is 57% of max
You’ll notice I’m only working on the wider view test of the barrels and van at the moment as I haven’t worked out the figures for this yet.
So, given these figures, the 8x10 can resolve 31% of max and the IQ180 can resolve 66% of max.
And then we have to take into account the focal length multipliers and so the 8x10 can resolve 20% less than that figure (because it is effectively using a wider lens) which makes it aprrox 26% of max resolution.
So, in conclusion the maths tells us that the 8x10 should be 42% of the resolution that the IQ180 is getting at the number plate.
Did we actually focus on the right place?
The final test is to see if the camera was actually focused on the right place. Markus fortunately took photographs at various apertures and if we take a look at the f/5.6 aperture on the 60mm lens, it is easy to see that the actual focal point is somewhere between the last oil drum at the back and the number plate (see attached image). In reality, this made little difference as the number plate was diffraction limited anyway.
The 10x8, as far as we can tell, was focused almost exactly in the right place (worked out by finding out where resolution dropped off either side and splitting the difference).
Was the scan at an appropriate resolution?
Given the 8x10 was only working at 26% of IQ180 resolution, for a pin sharp picture it only needed 2000 pixels across the height of the frame which works out as 2000px/8 inches = 252 pixels per inch. Hence the 745 dpi was over sampling and more than enough in theory.
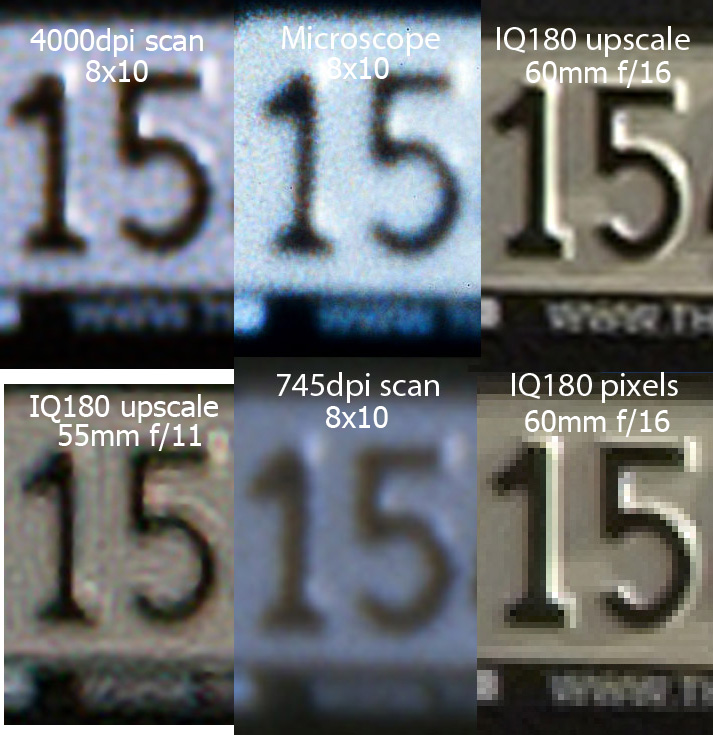
We did run a 4000dpi scan however and using deconvolution sharpening we got the following results as a comparison. We also took a photograph of of the transparency through a stereo microscope and included the results here. Ignore the bottom left result for the moment, we'll come back to that one later.
Interestingly it looks like the 8x10 is almost equal to the IQ180? How can this be? Well I would guess that the oversampling of the 8x10 image, even though out of focus, allows the sharpening algorithm to bring the contrast up at higher frequency. Sharpening to remove out of focus effects is arguably cheating as we end up oversharpening more in-focus areas.
It’s worth mentioning that most talk about resolution has to incorporate contrast and this is why most resolution figures state the contrast at which the resolution can be seen. If we look at 50% contrast resolution (often termed 50% MTF) it will be a lot less than 10% contrast resolution.
I would assume that even though the resolution of the 8x10 has been reduced dramatically, somewhere in there we can still get some higher resolution although at a very low contrast. Sharpening algorithms can increase that contrast and also refocus the blurred image to some extent. In addition to this, because of the Bayer array, it has been estimated that the actual resolution of a digital camera is a small amount less than 100% (I can’t show sources for this at the moment though - does anybody have links for this?).
What can we do to fix the test
Using a different aperture for the IQ180.
Markus fortunately took multiple photographs using the IQ180 at different apertures and so we have an f/8 shot on the 55mm lens which was focussed almost on the right place. f/8 is not quite the f/6.6 we really needed but we get a better test out of this.
The f/8 shot is not diffraction limited and should potentially be able to render the full maximum resolution of the sensor at the focal plane. Working out how this is reduced by the depth of field gives us a 16um CoC at the number plate and hence a value of 25% of maximum resolution.
The 8x10 was managing 31% of resolution but if we include the 10% advantage to the 55mm lens this works out as 28%. In other words we should get almost an exact match. However, given the fact that the 8x10 can resolve slightly more at lower contrasts we might expect a little advantage.
Here is the comparison.
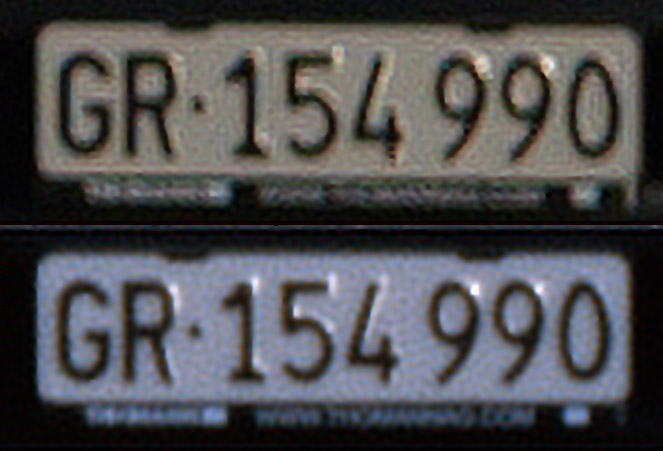
The top result shows the IQ180 with 55mm lens at f/8, the bottom shows the 8x10 f/32 result scanned at 4000dpi and sharpened
It should also be noted that another factor came into play with the 60mm IQ180 test. That is the difference in lighting between the 8x10, 55mm and 60mm shots. The 8x10 and 55mm were taken at approimately the same time and at that point, the sun was not directly illuminating the number plate (although there was a small highlight on the embossed numbers).
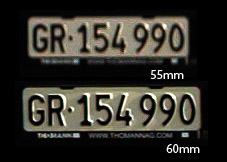
Top is the 55mm with little direct sunshine. Bottom is 60mm with direct sunshine (and focal point shift). These are both at f/8
However, when the 60mm test was shot the sun had moved around enough to directly illiuminate the number plate and at an almost 90 degree angle, sidelighting the embossed numbers and creating a large contrast difference betweem the numeral and it’s right hand edge. This contrast difference could easily double resolution/contrast figures (i.e. perceived resolution).
What next?
We’ve also taken a look at the longer lens tests and again the IQ180 results are just about diffraction limited and at an estimated 50m to the subject, we can choose anywhere between 40m and 70m away for our comparison as it will all be at approx the same resolution. Looking at our comparison of diffraction limits for 8x10 at f/32 and IQ180 at f/11 we should have 88% of max for the IQ180 and 150% of max for the 8x10 (or 62 megapixels for IQ180 and 180 megapixels for the 8x10 - if you want the calculations, just let me know).
We have taken an area that we think is the maximum resolution for the 8x10 and reproduced the comparison here.
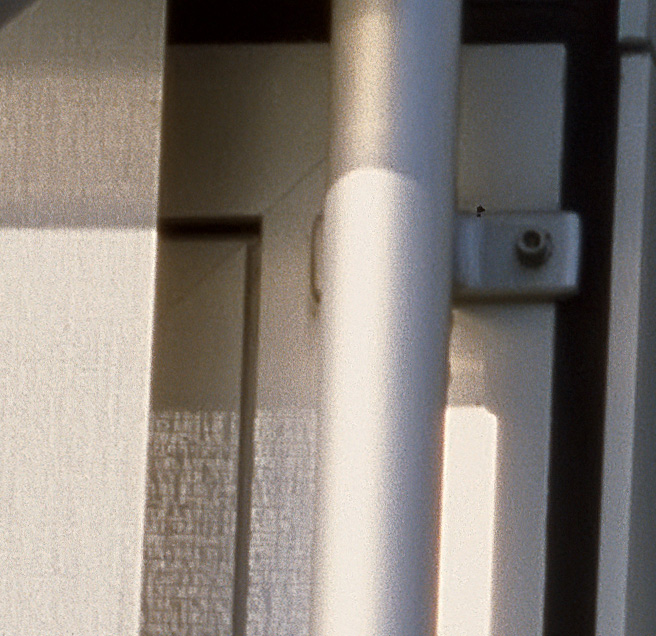
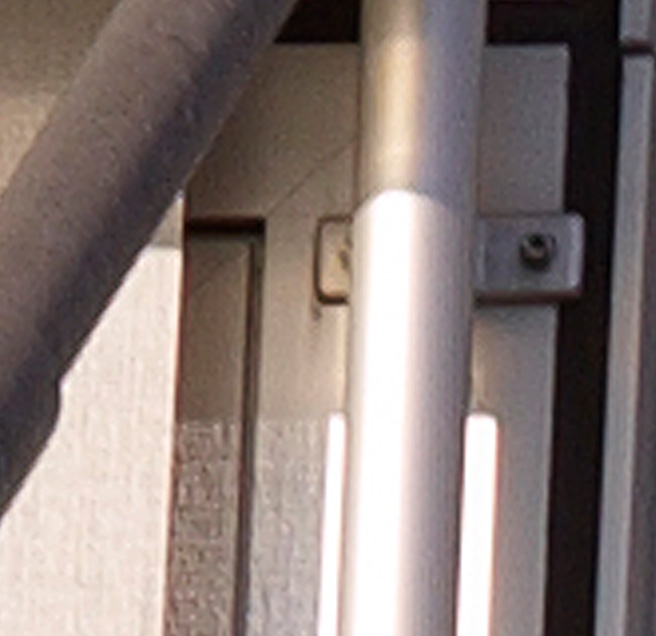
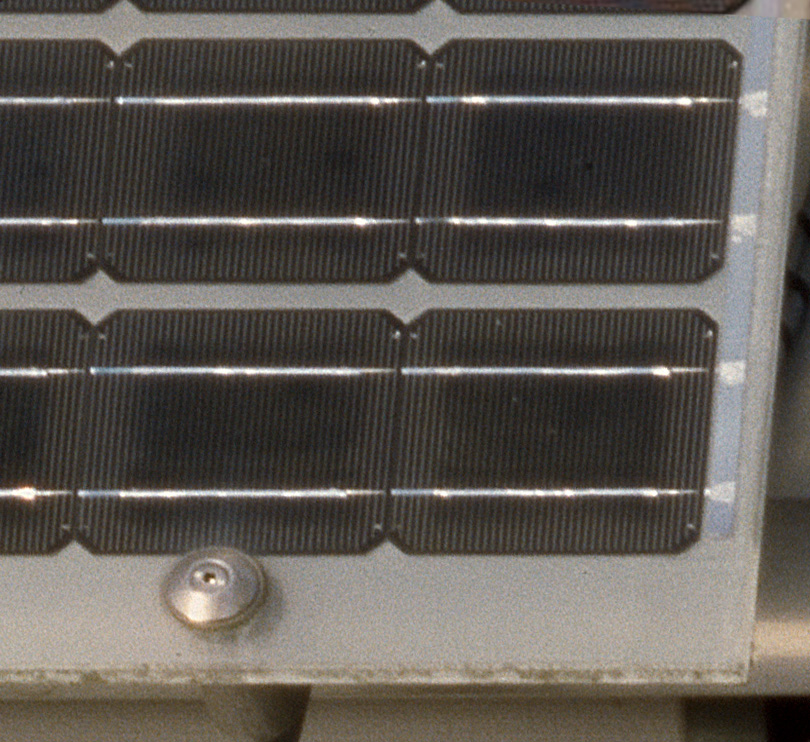
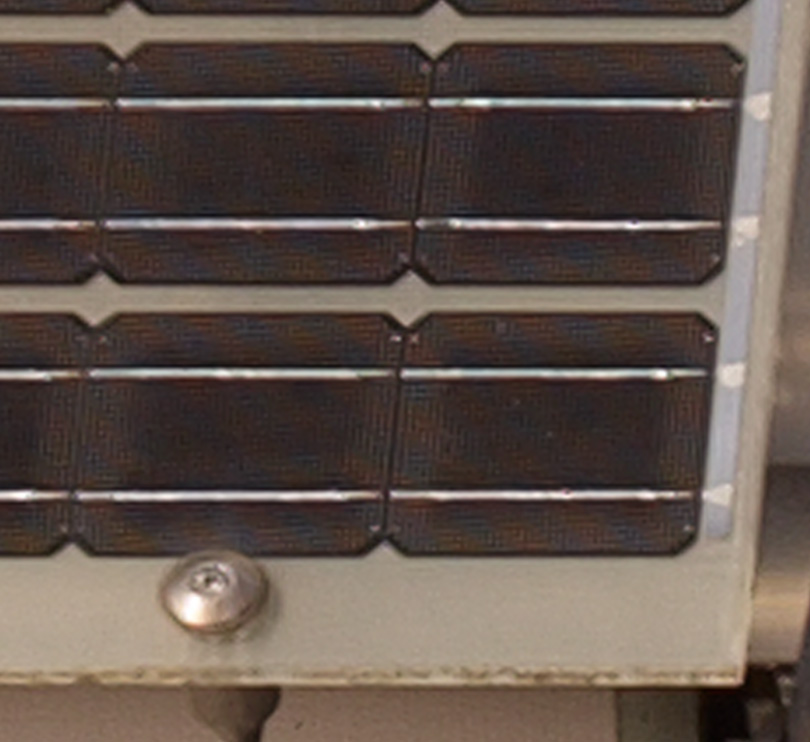
The two images above compare the 8x10 480mm f/32 on the left with the IQ180 110mm f/11 on the right. The 8x10 images have been transformed to align them and you can drag the green slider left and right to compare the two shots.
I don't think this is the end of the matter as the IQ180 should really have been shot at f/6.5 which would have allowed more resolution but less depth of field.
What next then
Well Markus and I both think a retest would be a good idea and we have spent the last week putting it together with help from Linhof Studio, Mr CAD, Phase One, IMATEST, Joe Cornish, Dav Thomas and many people at the large format photography forum. By the next issue we will have completed the initial test and will have gone a long way to some initial results which we will document. It will probably take a while to prepare a full set of results but we will pull all of the stops out for this.
Why?!
Because photography is a combination of art and craft and this is a test that it would be difficult for most people to make. We'll also be throwing 4x5, medium format film, the P45+ and a range of full frame DSLRs to give a full range of cameras types and costs. The best answer is probably "So you don't have to...".
Conclusions
The original test had a few different issues. The first was that the focal lengths tested were not equivalents which gave between 10% and 20% advantage to the IQ180. The second was that the apertures tested were not equivalent and that the IQ180 had much more depth of field than the 8x10 and because the test areas were not on the plane of sharp focus, this depth of field was more important than system resolution. The 60mm test (which gave a 20% advantage already) was also shot with direct sunlight cross lighting the number plate, giving a significant contrast advantage to the IQ180 and was also focussed on a point a lot closer to the number plate than the 8x10.
Finally, with the help of Markus, we compared the 10x8 on the long lens with an IQ180 shot at a different aperture and were able to show some results that may be more accurate. There has been a lot of criticism of Markus in the forums but he at least made the effort and motivated a discussion and we should applaud him for that.
Thank you for your patience with the maths in this article. If any of the terms or maths was not clear and you want to know more, I am happy to extend this with some extra 'detail boxes' that go into each part.

