THE Epic Comparison

Tim Parkin
Amateur Photographer who plays with big cameras and film when in between digital photographs.
We followed up the research on the first article by talking to a few different photographers in person in order to get their input on what a thorough test would look like, these subsequently helped with the actual running of the test (so a massive thanks to them!).
- Joe Cornish, who owns a Phase One P45 but has spent much of his career shooting transparencies on 4x5 film
- Dav Thomas, who started shooting digital DSLR’s but moved onto film and eventually large format
- Chris Ireland, Phase One’s representative in the North East of England
We also talked about the project on a few online forums, including the ‘Large Format Photography’ forum, the ‘Luminous Landscape’ forum. These were very helpful in picking the right approach.
Following the test, we talked to other photographers who use large format film, high-end digital or both, including Hans Strand, Andrew Nadolski & David Ward
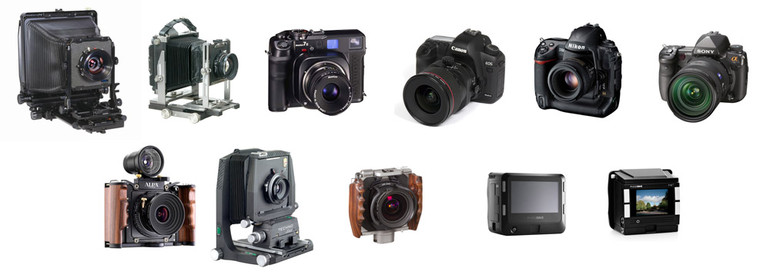
We started looking at which cameras to test and distilled the potential candidates to the following
Film Cameras
- Toyo 810MII
- Ebony 45SU
- Mamiya 7
Digital Cameras
- IQ180 on an Alpa
- IQ180 on a Cambo
- IQ180 on a Phase One 645DF
- Phase One P45 on a Linhof Techno
- Nikon D3X
- Canon 5Dmk2
We would have liked to have tested the IQ180 on the Linhof Techno as well but the platform used (any of them) didn’t contribute a great deal of difference to the sharpness of the result under ideal conditions so we don’t think this would have produced vastly different results. The Alpa and lenses were loaned to us by Paula of Linhof Studio the tilt shift lenses were loaned by Lenses for Hire and the D3X was contributed and operated by John Robinson.
Our next job was to select a range of lenses that would give us a close enough focal length match. We made a presumption that most people interested in the results would probably be thinking about moving from 4x5 to digital and so we decided to settle on that as the aspect ratio for our conversions. Given this, the ratio of the short sides of the IQ180 (40.4mm) vs the short side of 10x8 (196mm) gives a ratio of 4.6:1 - these calculations were made for all of the cameras and as we wanted to use the Rodenstock Digaron W lenses, we only had 40mm, 50mm and 70mm lenses to choose from. Here is the conversion table we came up with..
Bear in mind that the table below uses the IQ180 as the baseline. Hence the multiplier is 'how much do I need to multiply aperture or focal length to get the equivalent'. The %ge values next to each lens is a representation of how close it is to a perfect match for the IQ180 lens. This is mainly relevant for the landscape photograph shown later as we recomposed the picture by moving backwards and forwards to compensate for these changes (obviously we didn't want the difference to be too much because of perspective effects).
| short side / mm | multiplier | f/stop equiv | |||||||
| IQ180 | 40.4 | 1.0 | 5.6 | 40mm | 50mm | 70mm | |||
| 8x10 | 196.0 | 4.9 | 27.2 | 210 | 8% | 240 | -1% | 360 | 6% |
| 4x5 | 96.0 | 2.4 | 13.3 | 90 | -5% | 110 | -7% | 180 | 8% |
| 6x7 | 56.0 | 1.4 | 7.8 | 55 | -1% | 80 | 15% | 80 | -18% |
| 35mm | 24.0 | 0.6 | 3.3 | 24 | 1% | 24 | -19% | 50 | 20% |
The table above also shows the f/stop equivalents. We estimated that the sharpest aperture for the IQ180 would be f/5.6 and so bracketed the photographs around this aperture. Obviously this needed converting to keep the same depth of field for each size of film/sensor and so the equivalent f/stop for 8x10 was f/22⅔ : 4x5 was f/11⅓ : 6x7 was f/8 and 35mm was f/4.. In reality, we realised that imperfect lens design would mean the optimum aperture may be larger than these and hence we bracketed with smaller apertures to make sure we found the sharpest point.
Given the available focal lengths in 8x10 and 4x5 we decided to use the 40mm and 70mm Digaron W lenses which gave the following equivalent lenses.
8x10
For the 40mm equivalent we chose the Fujinon 240A, a very popular 4x5 lens which covers 8x10 with some room to spare. The resolution figures suggested it to be a fairly sharp performer. It was a bit longer that we would have liked but for the studio test we were able to move the camera back to compensate and ensure the same framing.
For the 70mm equivalent we shopped around and finally Mr CAD loaned use a huge 360mm Schneider Symmar-S which we knew would perform exceptionally well and only had a 6% difference in focal length* giving a small advantage to the 8x10 for the landscape view.
4x5
For the 40mm equivalent we chose the Rodenstock 90mm f/4.5 Grandagon N, one of the best 90mm lenses available.
For the 70mm equivalent we chose the Fujinon 180A, another classic large format lens and one that matches the 70mm fairly well although gives an 8% advantage to 4x5 over the IQ180*
* i.e. If the cameras were shot from exactly the same position, the %ge difference would be a magnification ration. This translates directly into a %ge difference in resolving power. However, for the studio tests, we repositioned the cameras to compensate for this effect.
6x7
For the 40mm equivalent we chose the 55mm. The Mamiya 7 does not have a great range of lenses for quantity but for quality they are amongst the sharpest lenses ever made and this matched the focal length well.
For the 70mm equivalent we again didn’t have a close match and the resulting shots have a disadvantage of nearly 20%.
35mm
The 40mm equivalent on 35mm cameras was a handy 24mm and we decided to compare using tilt shift lenses on both the Nikon and Canon systems (the latest versions).
The 70mm equivalent wasn’t really a great match again, giving a 20% advantage to 35mm.
Test Targets
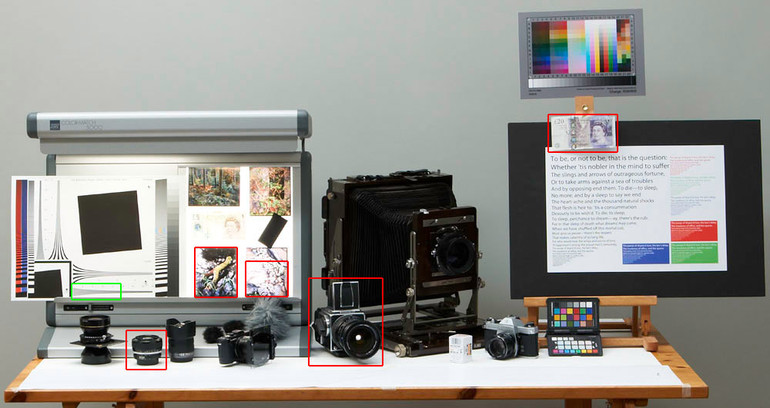
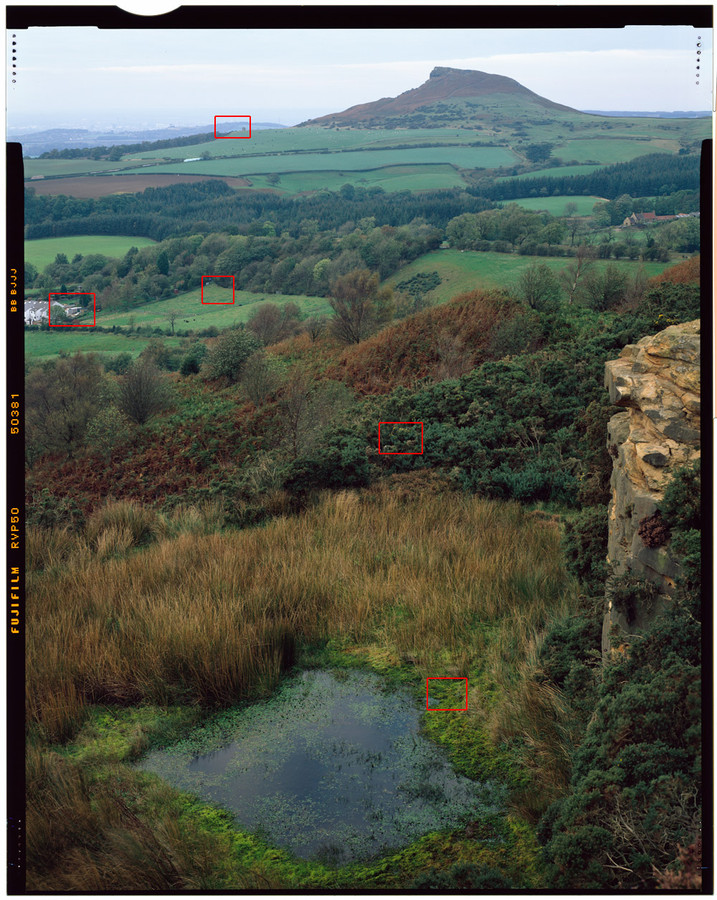
Here is a sample picture of the test target used.
The areas that we will show in our tests are marked in red. The sample that is used in the absolute resolution test is marked in green
We were very keen on having some real world targets for the resolution testing but after some debate we also decided to include proper resolution targets and in retrospect it was a wise decision. The tests used were the slanted edge target supplied by Imatest (printed on matt paper using an Epson 4800). The slanted edge target also includes a ‘resolution trumpet’ (I’m sure there is a proper name for this) which is a set of lines which gradually get finer and closer together. We calculated the resolution of these lines so that even in the very best scenario of 8000dpi 8x10 being pin sharp we would still have resolution to spare. We also included a few slanted edge lines in different colours to take a look at possible bayer array issues.
The test on the right was for a 'readability' test. This is to combat the potential for raw converters or sharpening to add data that wasn't in the original image. Again these were included in the three primary colours. Two colour targets were included as well, one a colorchecker and the other a Wolf Faust IT8 target. The light box used for the main resolution tests is a Just Normlicht Colormatch 5000 which has a colour balanced proofing light and lightbox. The lightbox is used to display four transparencies that include typical landscape scenes.
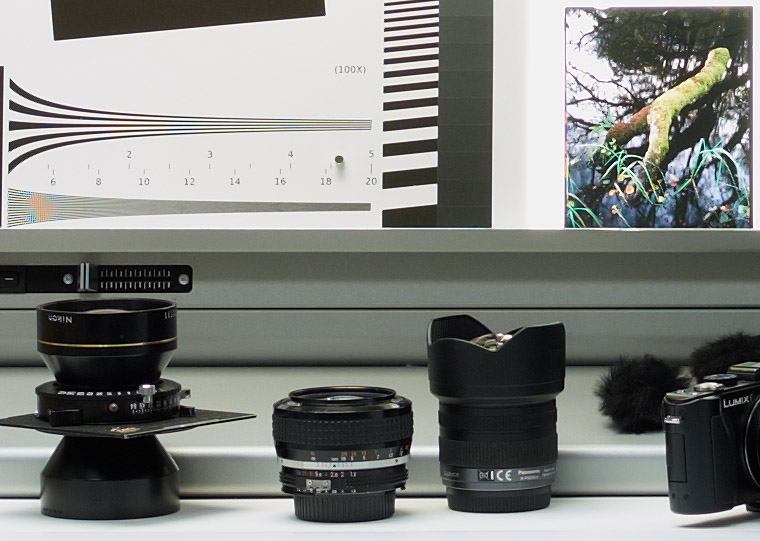
We have also included a five pound note and a twenty pound note which provide very fine detail to check rendering. Finally, we raided Joe Cornish's camera cupboard and laid out a few lenses and cameras. The results show extracts from the Hassleblad, Nikkor Lens, Transparencies and the twenty pound note.
The exposures were made based on the different films used. For instance for the digital cameras we exposed using the histogram and checked this with the light meter. For transparency film we spot metered the paper white and set this at +1⅔; the negative exposure was made by setting the darkest shadow at -2 (we chose the darkest part of the 8x10 camera bellows) and the black and white was set with the paper whites on the lightbox at +3 stops.
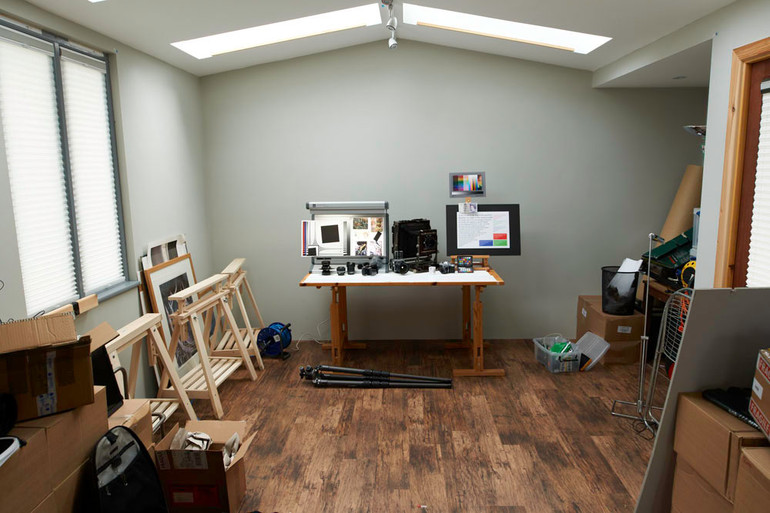
The photographs were taken over the space of a three hours and the ambient light in the room changed by about a stop over this period. Obviously the illumination of the lightbox remained constant throughout.
Ensuring Stability and Sharpness
- Making sure that the cameras produce the sharpest results possible is an art in of itself. Instead of going through all of the steps taken, here is a summary
- Using a five series Gitzo tripod with a BH55 ball head with spikes
- Ensuring no one moving when exposures were taken and give time for system to settle (no main roads nearby etc)
- Use two tripods for the 8x10 shot (a Velbon Sharpa/Carmagne CF tripod and a five series Gitzo tripod) the smaller tripod supporting the lens end of the camera.
- Use double sided tape for the dark slides for 4x5 and 8x10 (more about that later)
- Final focus with an 8x Schneider loupe for 4x5 and 8x10
- Use live view for digital focussing
- For the main aperture chosen, take multiple shots (this includes film e.g. 3 sheets of Provia for both 8x10 and 4x5)
- For outdoor shots, ensure that tripod legs are firmly bedded into subsurface of soil
- Protect camera from wind (using bodies for larger cameras)
The studio IQ180 photographs were taken using three different camera systems, an Alpa SWA, a Cambo Wide RS and a Phase One 645DF. Although we used the 40mm Rodenstock Digaron W on the Alpa, the lens used on the Cambo was a Schneider 35mm f/5.6 APO Digitar XL and the lens used on the Phase One 645 was the Phase One 45mm Digital AF f/2.8. Remember that the position of all cameras was changed to ensure the same view on the sensor/film.
The film was developed at Peak Imaging, Sheffield (Xtol was used for the black and white processing) and the 8x10 black and whites were developed by Palm Labs, Birmingham. The film was checked using an 80x stereo microscope and photographs were taken through the microscope to record absolute resolution on film. 4000dpi scans were then made using a Howtek 4500 drum scanner with higher resolution scans made by Matt Kaye of Karmaan. on an ICG and Lanovia. It should be noted that the scans were made at an aperture of 6 micron which gets the sharpest pictures but does mean grainy results, scanning with an aperture of 13 micron reduces the noise considerably at a very slight loss of resolution. The following image shows the resolution target results that have been aligned to keep the resolution axis label consistent. Some of the resolution axes were so long that we had to composite the final microscope images from multiple photographs (e.g. the 8x10 black and white result). Digital images were uprezed using Capture One - we tried alternative methods but the results did not change the underlying resolution results. Some of the details are too fine to see on this version - click here for a 1600px wide version.
It is worth noting that we have based our results on the highest resolution camera in our test, in this case it was the 8x10, and enlarged the other results to compare.
We should also mention the sharpest aperture chosen for each platform. The sharpest aperture on the IQ180 was generally f/4 although more contrasty is a better description (see later). The sharpest aperture on 5x4 was f/16⅔ and on 8x10 was also f/16⅔ - this shouldn't completely surprise us as the most large format lenses perform best at the centre of their image circle at between f/16 and f/22. We also shot images at smaller apertures and the reduction in resolution was quite interesting and is reproduced in a separate table below the results here. The 35mm sharpest aperture was f/5.6 but like the medium format, very little extra information was recorded, the contrast was just higher.
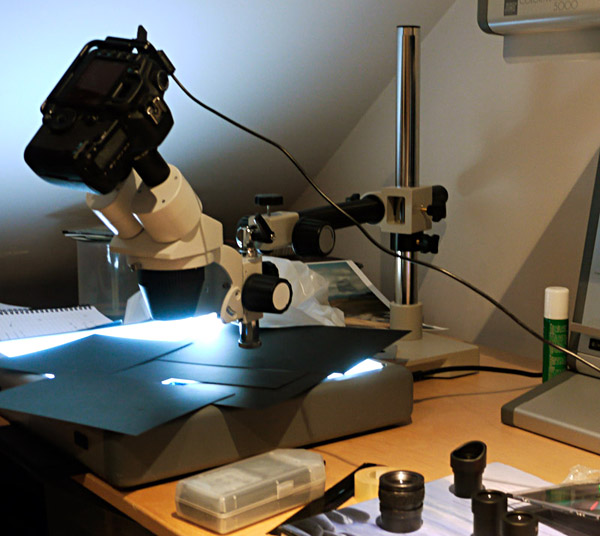
You may ask why we are using a microscope to look at the film (and possibly how did we get pictures?). Well many people say that you can get sharper images by enlarging film and the only way to find out the true capability of the film without enlarging is to check through a microscope, the following image shows our 80x stereo microscope. The images were taken using a Canon 5Dmk2 but even this was not able to show the very finest of lines visible through the microscope. e.g. the Mamiya 7 T-Max result shows 7 as the highest value when photographed through the microscope but we can clearly see a value of 9 by eye (the microscope has a higher magnification when used by eye). This suggests that it may be possible for the Mamiya 7 to resolve as much as 4x5 with a very good enlarger. This remains to be tested.
We have used these images to work out what the optimum scan size is by assuming that you need at least one pixel per line to represent the test chart. For example, the 8x10 delta 100 result shows a maximum figure of 14 (i.e. you can see a separation of lines at the number 14 on the chart). At this position on the chart, we can work out what percentage of the frame height is represented by the group of fifteen lines which is 0.134% hence if we need 30 pixels to represent 15 lines, we should have 30/0.00134 approx 22400 pixels for the frame height. We can work out the frame width by dividing by 8 and multiplying by 10 = 28000 pixels and hence we can work out how many megapixels this represents = 28,000 x 22,400 = 627 megapixels. We can also work out how big a print this is by dividing the 22,400 pixels in height by a 300dpi print resolution which makes a 75" wide, 93" high print.
| max resolved | height in pixels | Mp | print size (inch) where dpi=300 | ||
| 8x10 Delta 100 (microscope) | 14 | 22400 | 627Mp | 75" | 93" |
| 8x10 Delta 100 (4000dpi) | 14 | 22400 | 627Mp | 75" | 93" |
| 4x5 Delta 100 (microscope) | 12 | 19200 | 461Mp | 64" | 80" |
| 4x5 Delta 100 (8000dpi) | 11 | 17600 | 387Mp | 59" | 73" |
| 4x5 Delta 100 (4000dpi) | 10 | 16000 | 320Mp | 53" | 67" |
| 4x5 Provia 100 (microscope) | 11 | 17600 | 387Mp | 59" | 73" |
| 4x5 Provia 100 (4000dpi) | 8 | 12800 | 205Mp | 43" | 53" |
| IQ180 | 5 | 7760 | 80Mp | 26" | 32" |
| Mamiya 7 Portra (microscope) | 6 | 9600 | 115Mp | 32" | 43" |
| Mamiya 7 T-Max (microscope) | 7 | 11200 | 157Mp | 37" | 47" |
| Mamiya 7 T-Max (8000dpi) | 5 | 8000 | 80Mp | 27" | 33" |
| Mamiya 7 T-Max (4000dpi) | 4 | 6400 | 51Mp | 21" | 27" |
| Nikon D3X | 2.4 | 4000 | 24Mp | 13" | 20" |
| Canon 5D2 | 2 | 3700 | 21Mp | 12" | 19" |
These figures should not be taken as bare facts of perceivable differences as different cameras have more or less grain for instance and even though the target resolution was visible, they may have been at less contrast. This does indicate our evaluation of resolving power of these systems though. Items in grey italics are the theoretical results based on microscope analysis. Also it should be mentioned that these figures work out slightly higher than mathematically calculated resolving powers due to diffraction - however these assume a certain level of contrast and we are looking at the 'extinction' value where the detail actually disappears. This has given us an extra 10-15% of resolution compared with theoretical values of maximum enlargement.
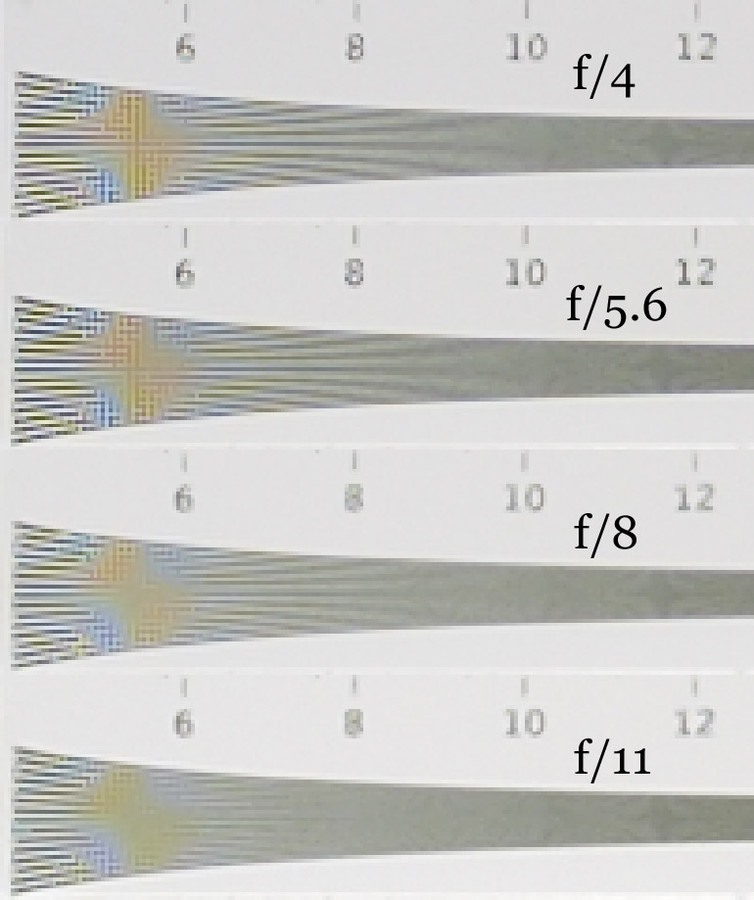
Below are the examples showing reduction in resolution at smaller apertures - italics here are used to show the smaller aperture results. I haven't included the results from the IQ180 at different apertures as the camera was sensor limited and resolved the same amount of lines for f/4 f/5.6 f/8 and f/11 - the only difference was that the f/4 and f/5.6 were contrastier and showed more moire. The f/11 result was lower contrast but showed no moire - I've included a photo of the details here which have been scaled up using 'preserve edges' to show actual pixel detail. There was some concern about whether the IQ180 results were in focus; we used live view to focus check but the 1s refresh didn't allow us to do the normal 'sweep' through the focus range to pick the sharpest point. However, it did let us confirm that moving the focus back and forth did not change focus at all and hence we were fairly sure we were at peak focus. We also checked what the depth of field was using the 5 micron pixel size and calculated a value of 20cm front to back. This gave enough room to focus on the chart and still get the cameras within the focus spread. It also confirmed that the camera is sensor limited. i.e. the lens is outresolving the camera,
| max resolved | height in pixels | Mp | print size (inch) where dpi=300 | ||
| 4x5 Provia 100 f/16⅔ (4000dpi) | 8 | 12800 | 205Mp | 43" | 53" |
| 4x5 Provia 100 f/22⅔ | 7 | 11200 | 157Mp | 37" | 47" |
| 4x5 Provia 100 f/32⅔ | 6 | 9600 | 115Mp | 32" | 43" |
| 4x5 Provia 100 f/45⅔ (extrapolated) | 4.3 | 6912 | 60Mp | 23" | 28" |
| 8x10 Delta 100 f/16⅔ (4000dpi) | 14 | 22400 | 627Mp | 75" | 93" |
| 8x10 Delta 100 f/22⅔ | 12 | 19200 | 461Mp | 64" | 80" |
| 8x10 Delta 100 f/32⅔ | 9 | 14400 | 259Mp | 48" | 60" |
| 8x10 Delta 100 f/45⅔ (extrapolated) | 6.5 | 10400 | 134Mp | 34" | 43" |
| 8x10 Delta 100 f/64⅔ (extrapolated) | 4.7 | 7500 | 70Mp | 25" | 31" |
The results for the Mamiya 7 when observed through the microscope directly gave higher figures than the photos through the microscope. At f/5.6=8, f/8=9, f/11=7, f/16=6 - obviously these results will probably all resolve down to 4 or 5 when drum scanned on a 4000dpi scanner. This does suggest that darkroom prints may be able to made to a scale similar to 4x5 if very high end equipment and techniques are used.
We also have comparison samples from some of the areas of the test target.
Studio Nikon Lens
You can download the psd file by clicking here.
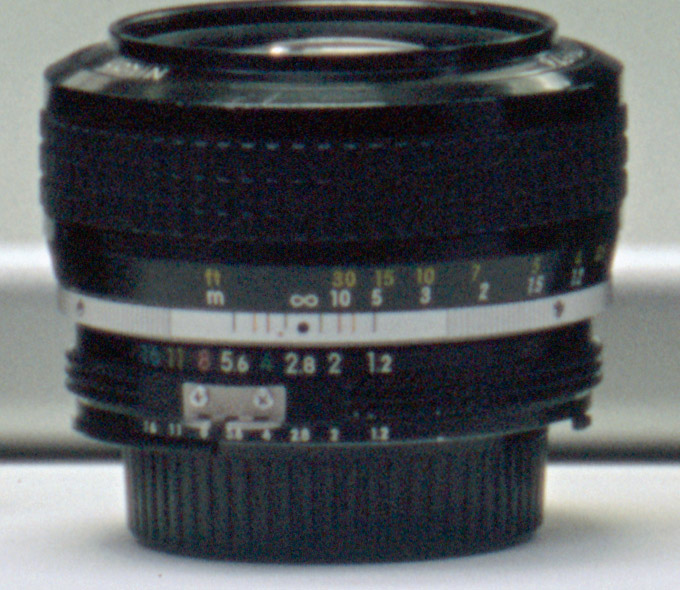
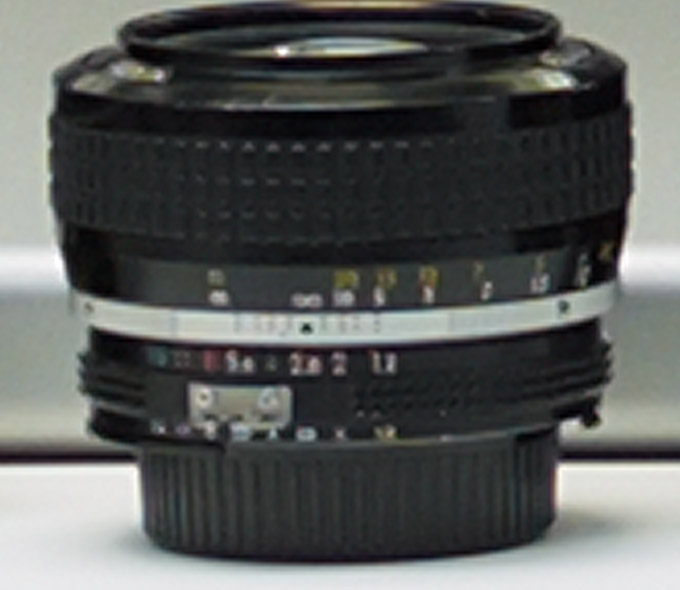
The right hand side is the IQ180 on the Alpa - by default the left hand side is the 8x10 Provia but you can change this by clicking on the links below (noise reduction has been applied using Imagenomic Noiseware to the second set)
|
Now the IQ180 result doesn't look particularly great here but this has been enlarged considerably to bring it up to the same size as the 8x10 4000dpi scan. You can see in the image below a 100% view of the area including the Nikon lens and if you click on it you can see the whole of the target area at 100%. You can download a sample of the 8x10 black and white file although be aware that it is a 26Mb zip file.
The studio test is the main result of our work but we can't finish here. We need to take some real pictures in real conditions. It's always been suggested that although you can theoretically get high resolution results out of 4x5 and 10x8, there are lots of compromises in real world use that mean it is unlikely that studio based results can be repeated. Well nearby to our studio work is a handy sandstone edge with a great view to the horizon. The view is from Kildale looking over to Roseberry Topping with the city of Middlesborough in the background. The following picture shows the 4x5 Velvia photograph taken without using a grad (showing more dynamic range than many people would credit Velvia with - the sky was reading about 13EV and the foreground about 5-6EV in the darkest areas).
The one issue with taking images of long distance views is that any difference in focal lengths can't be compensated for by 'just getting a little closer' so we can't use these results as a resolution comparison without taking into account the slight differences in focal length. These differences can be summarised as a 7% advantage for 4x5 and 8x10 over the IQ180, a 20% disadvantage for the Mamiya 7 and a 20% advantage for the Sony A900. In real terms, the 7% advantage for the 4x5 and 8x10 is small enough to be difficult to notice (effectively this is smaller than a 1/10 of a pixel advantage in fine detail) and is equivalent to the difference between 18Mp and 21Mp cameras. The 20% disadvantage for the Mamiya is fairly large and would be noticeable and represents the difference between 10Mp and a 16Mp camera - something people pay a lot of money for!
The idea of this test is more about comparing the way the results are rendered, the tonality and colour. The resolution of the IQ180, 4x5 and 8x10 are close enough in focal lengths that comparing them as 'equivalent' is fine for all but absolute resolution purposes.
The image was taken under quite windy conditions, probably about 20-30 mph with the occasional stronger gust. We used a firmly grounded tripod and a second tripod on the 8x10 supporting the front element. We tried to protect the cameras from the wind with our body (bodies for the 8x10) but it was coming toward the front of the camera so was difficult to stop easily.
We have done basic colour and contrast adjustments to match the images where possible (using the Portra as a baseline) but we made sure that we only use a simple central colour picker for the colour balancing and a simple photoshop curve (two control points) for the contrast. We thought that this would be better than comparing images with vastly different colour balances.
It should be noted in all of these tests that whilst some of the cameras look particularly bad (i.e. the Mamiya 7, P45 and DSLR's) this is only because they are being enlarged a great deal more than you would ever do in a real world situation. These shots on screen represent looking at a 12m by 8m print (assuming screen resolution of 100dpi) or a 6m by 4m print in the cases where the tests are marked by "50%".
All of the extra tests are currently available on the following pages. Please note the following
Sharpening was done with a combination of Smart Sharpen (which uses a deconvolution sharpening depending on size of radius) or Photokit Sharpener. Noise reduction was done with Imagenomic's Noiseware plugin. Additional noise was added to one of the IQ180 scans (noted in the tests) using Photoshop's 'add noise'.
http://static.timparkin.co.uk/static/tmp/cameratest-2/800px.html
http://static.timparkin.co.uk/static/tmp/cameratest-2/large.html
We recorded some video but didn't really do a good enough job to make it into anything exciting but thought it may add some background.
We solicited a few opinions on the results from various photographers who use different platforms discussed which you can read here. I have also written my thoughts on the results combined with a few more calculations and conclusions here.
Addendum
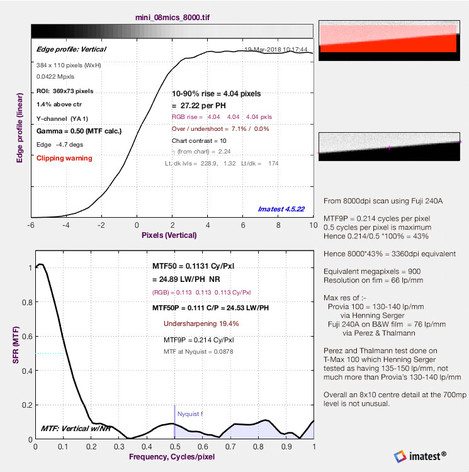
A few questions were raised about the accuracy of our resolution figures for the the 8x10 test. We took our best scan of the frame taken on Provia 100 and put the result through Imatest's SFR (Slanted Edge) resolution tests. This gave a maximum resolution at MTF9 of 3360dpi or 66 line pairs per mm. This correlates well with other tests online i.e. Henning Serger tested the peak resolution of Provia 100 recorded in a 35mm camera as 130-140 line pairs per mm. Chris Perez and Kerry Thalmann tested the 240A lens used on the 8x10 as producing 76 line pairs per mm in the central area onto T-Max 100. Henning Serger's test of T-Max 100 produced 140-150 line pairs per mm.
The resolution of 3360dpi on a 10x8 camera is equivalent to 900 megapixels. The difference between this and the 650mp is only approx 15% difference in linear resolution. Here's the Imatest results page.
This article was featured in our bumper christmas issue which you can access here.
[vimeo https://vimeo.com/101697293 w=656]
Other Related Large Film Camera Articles
John Blakemore - Conference video
Tristan Campbell - Featured Photographer

